
Our readers keep the lights on and my morning glass full of iced black tea. As an Amazon Associate, I earn from qualifying purchases.
Specs are compiled from manufacturer listings and verified buyer reviews and can change over time — please confirm the key details on the product page before buying.
You want a printer that produces a clean part the first time, not one that turns every weekend into a calibration experiment. That is the whole reason this list exists. Fused deposition modeling — FDM for short, the type of 3D printer that melts plastic filament and lays it down in layers — has split into two camps over the last few years. One camp still asks you to tram the bed by hand and tweak a slicer profile for an afternoon. The other camp levels itself, compensates for vibration, and just prints. Nearly every pick below sits in that second camp, and the differences between them come down to a handful of real numbers: how fast the toolhead accelerates, how much waste a color change creates, how tall an object you can build, and how hot the nozzle and chamber can get.
I’m Min — the founder and writer behind Gadgets Feed. This guide is built by comparing the manufacturers’ published specifications and the patterns across verified customer reviews, so you get each pick’s real strengths and trade-offs instead of marketing spin.
Acceleration, chamber heat, and waste per color change decide how an FDM machine actually feels to own. So here is the honest breakdown of the best 3d fdm printers.
Our Picks at a Glance


How To Choose The Best 3D FDM Printers
Ignore the spec-sheet arms race for a minute. What decides whether you enjoy this hobby or quietly resell the machine in three months is how little babysitting it needs. Everything below is about sorting machines by how much of your time they consume.
Acceleration Beats Top Speed Every Time
Max speed in mm/s is the number splashed across every listing, but acceleration in mm/s² is what your hands actually feel. Acceleration is how quickly the toolhead gets up to that speed and back down again before it turns a corner. A printer that claims a high top speed but accelerates slowly never reaches it on a small part, because the toolhead is already braking for the next corner. That is why a machine rated at 20,000 mm/s² finishes a small model noticeably sooner than one rated at 2,500 mm/s², even though both list impressive top speeds. When you compare two printers, put the acceleration figures side by side first.
Build Volume Sets What You Can Print In One Piece
Build volume is expressed as three dimensions — width, depth, and height — and it is simply the biggest cube of space the nozzle can reach. A 220 x 220 x 220 mm machine handles helmets, brackets, and figurines in pieces. A 350 x 350 x 350 mm machine handles a full-size prop or a batch of small parts in one run without splitting the model. A larger bed takes longer to heat and adds moving mass. Buy the volume your projects need.
Nozzle Temperature And A Heated Chamber Decide Your Filaments
Every filament has a temperature it wants to be extruded at. Standard PLA prints happily around the low 200s Celsius, while engineering materials like PPS-CF and PC need far hotter nozzles plus a warm chamber around the part to stop it warping as it cools. A 350°C or 370°C nozzle rating is your ceiling for exotic materials. A heated chamber rated at 60°C or 65°C is the second half of that equation. If you only print PLA and PETG, that headroom goes unused.
Multi-Color Systems Trade Waste For Convenience
A filament-changing system lets one print come out in several colors. The catch is how it swaps. Most designs pull the old filament out, push the new one in, and purge the mixed material into a waste bin. Every color change costs you filament and time. Tool-changer designs sidestep that purge by physically swapping whole print heads, which is why they waste so much less. If multi-color is a core part of what you want, read the waste handling carefully.
Quick Comparison
| Model | Best For | Acceleration | Max Speed | Build Volume | Amazon |
|---|---|---|---|---|---|
| Bambu Lab A1★ Best Overall | First printer | 10,000 mm/s² | — | — | Amazon |
| Creality Ender 3 V3 SEBudget Champion | Tight budgets | 2,500 mm/s² | 250 mm/s | — | Amazon |
| FlashForge Adventurer 5MTop Performer | Compact speed | 20,000 mm/s² | 600 mm/s | 220 x 220 x 220 mm | Amazon |
| Anycubic Kobra X | Built-in 4-color | — | 600 mm/s | 260 x 260 x 260 mm | Amazon |
| FlashForge AD5X | 4-color value | 20,000 mm/s² | 600 mm/s | — | Amazon |
| ELEGOO Centauri Carbon 2 | High-volume printing | 20,000 mm/s² | 500 mm/s | — | Amazon |
| QIDI Q2 | Engineering filaments | — | 600 mm/s | — | Amazon |
| Bambu Lab P1S Combo | Enclosed reliability | 20,000 mm/s² | 500 mm/s | — | Amazon |
| Snapmaker U1 | Waste-free color | — | 500 mm/s | 270 x 270 x 270 mm | Amazon |
| Original Prusa MK4S Kit | DIY builders | — | — | 9.84 x 8.3 x 8.6 in | Amazon |
| Creality K2 Plus Combo | Large parts | 30,000 mm/s² | 600 mm/s | 350 x 350 x 350 mm | Amazon |
In‑Depth Reviews
1. Bambu Lab A1 3D Printer, Ready-to-Use FDM 3D Printer for Beginners and Kids
Our pick — over 4.5★ from 650+ verified ratings; the strongest balance of quality and price.
The machine that made an entire hobby stop arguing about bed leveling
For a first FDM printer, the number that separates this one from the pack is how little you have to touch it. Bambu Lab rates the A1 at 10,000 mm/s² of acceleration — the toolhead gets up to speed and slows for corners about as briskly as a desktop machine can. Calibration is fully automatic, covering the Z-offset (the tiny gap between nozzle and bed that decides whether plastic sticks) and bed leveling itself. You slice a file, hit print, and watch it work.
The full-auto calibration is the real story here, and it explains why parents end up owning this machine. Owners describe it as a reliable workhorse that arrives ready and simply runs, with the clearest sentiment being that a ten-year-old can operate it unaided. Runs of sixteen hours a day churning out kids’ toys have been reported without issue. There is also a 1-Clip quick-swap nozzle, so a worn or clogged tip comes off and a fresh one goes on without recalibrating anything. Active flow-rate compensation keeps the extrusion even, and motor noise canceling keeps the thing quiet enough to sit in a shared room.
Two caveats worth knowing before you commit. Multi-color printing is not built in — you need the AMS lite (the four-spool automatic feeder) as a separate add-on or buy the combo version. Color changes are also done by purging filament, and those purges add up across a long multicolor job. And this printer is noticeably bigger and heavier than the compact Creality Ender 3 V3 SE — 21.76 x 20.83 x 12.87 inches at 22 pounds versus the Creality’s 15 x 19.6 x 15 inches at 19.8 pounds — so clear real bench space rather than a shelf corner. For a beginner machine that behaves like a finished product rather than a project, this is where most people should start.
Where The A1 Wins
- Fully automatic calibration covers Z-offset and bed leveling, so the first layer lands without hand-tuning
- 10,000 mm/s² acceleration keeps small prints moving rather than crawling
- 1-Clip quick-swap nozzle swaps in a new tip without a recalibration pass
- Active motor noise canceling keeps it living-room quiet
What To Plan Around
- Multi-color needs the AMS lite, which is not included in the base machine
- Purge-based color swapping wastes filament on long multicolor jobs
- Takes up more desk area and weighs more than the compact budget pick
Reach for this if: you want a first FDM printer that calibrates itself and lets a kid run it unsupervised.
Look elsewhere if: you already need four-color printing in the box, because this one needs the AMS lite added on.
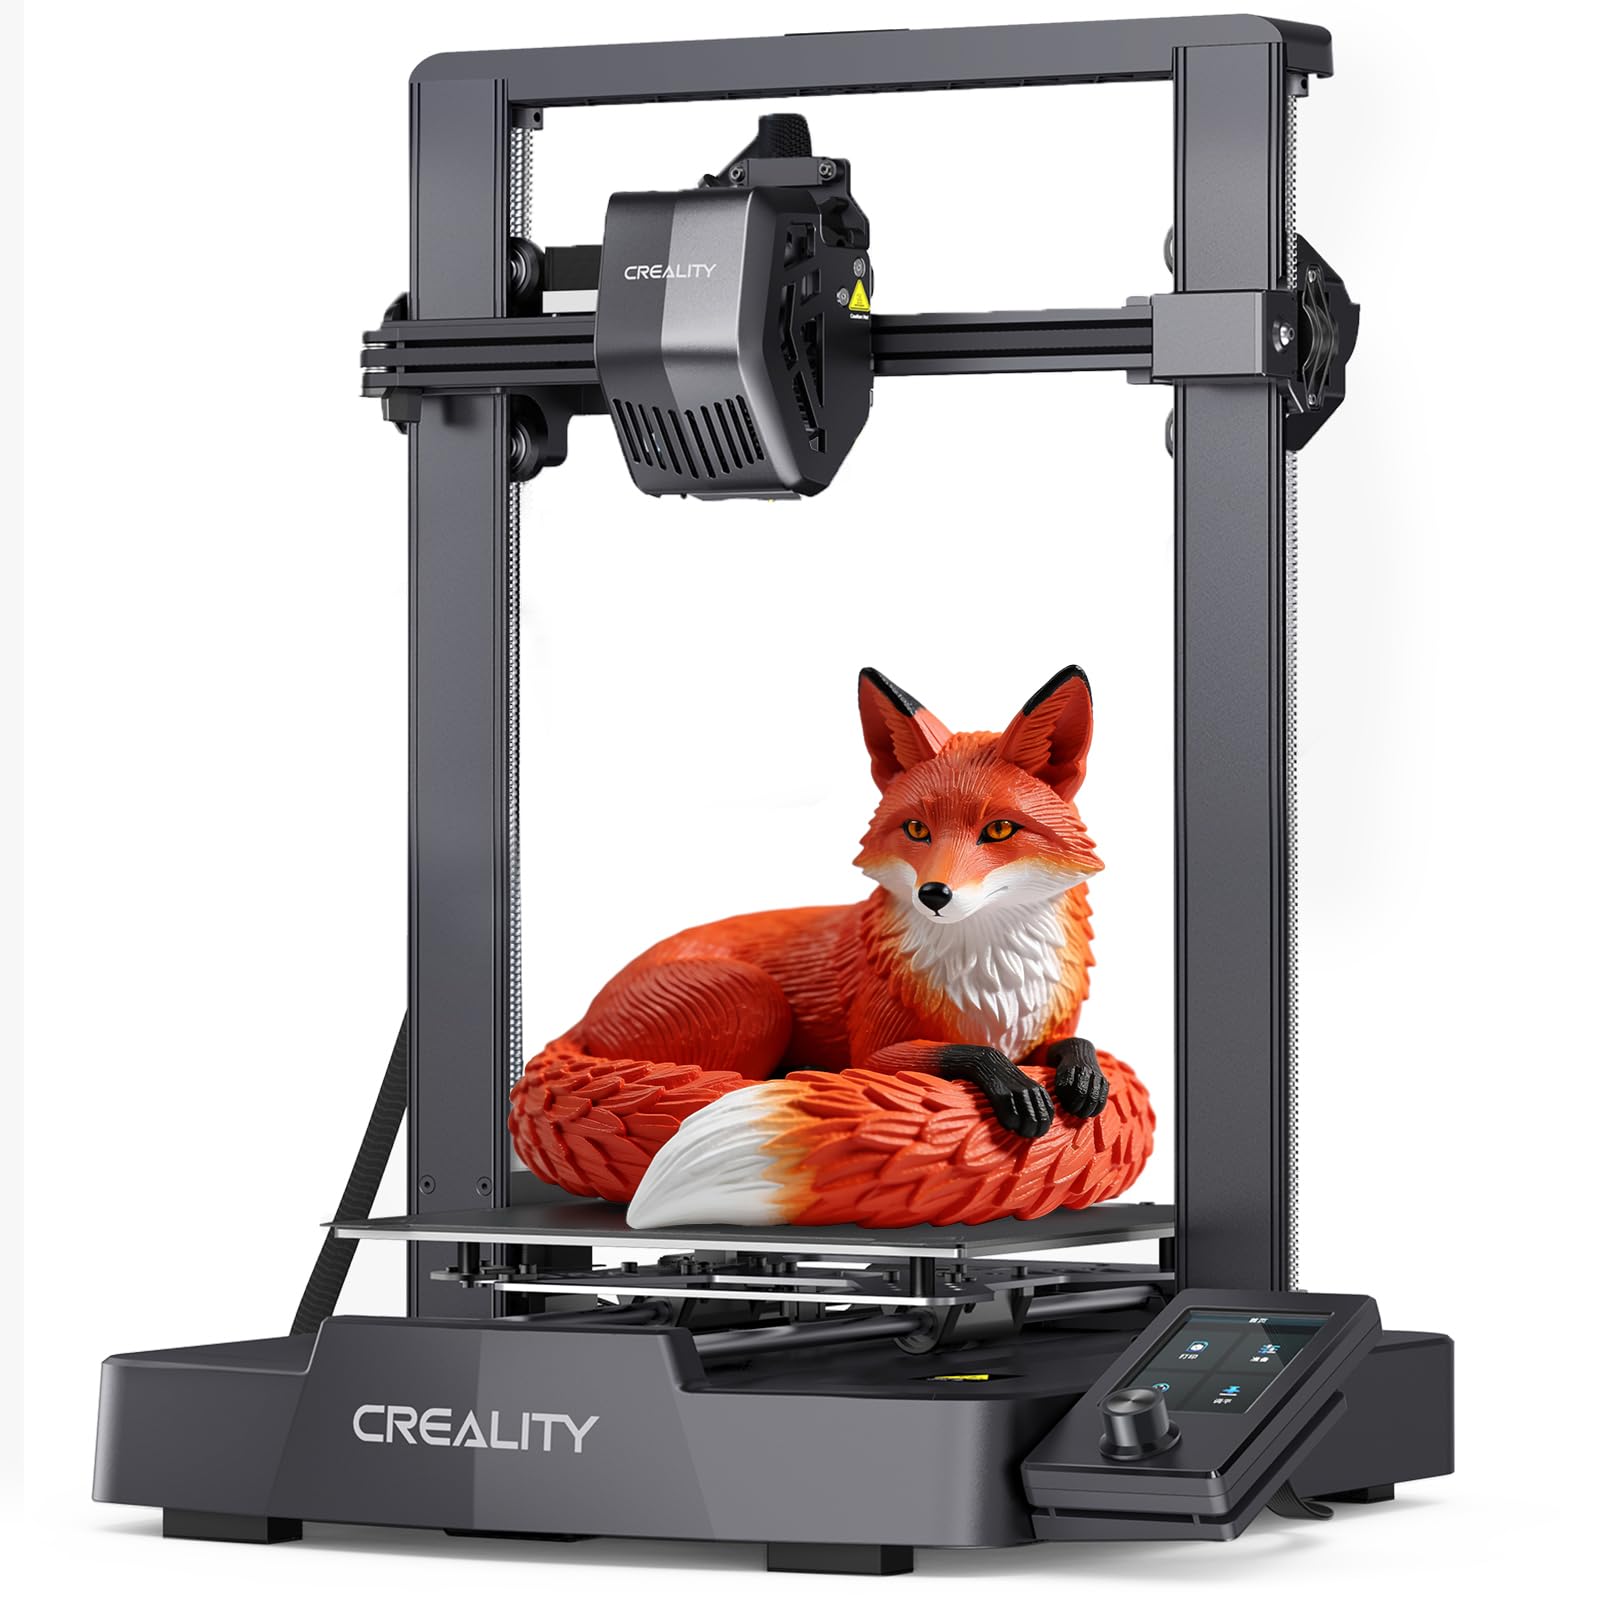
2. Creality Ender 3 V3 SE Beginner-Friendly 3D Printer with Auto Leveling
The cheapest honest way into FDM, if you accept you will fiddle with it
This is the entry-level machine that most people should consider before spending more, and the spec that defines it is acceleration: 2,500 mm/s² against the FlashForge Adventurer 5M’s 20,000 mm/s². That gap is the whole difference in feel. On a small part, the Ender never reaches its 250 mm/s top speed because it is already slowing for the next corner. On a big flat piece it stretches its legs just fine.
What it does well is get you printing without drama. Assembly takes a few simple steps, the CR Touch auto-leveling probe handles the bed and Z-offset for you, and owners consistently say a full setup takes about twenty minutes with the included allen key — as the review pages put it: “Auto-level feature, ~20 min setup with allen key.” The Sprite direct-drive extruder (the motor sits right above the nozzle, which helps it push flexible filament cleanly) handles PLA, PETG, and TPU. A flexible PC spring-steel plate lets a finished model pop off with a bend, and a 32-bit silent mainboard keeps the noise reasonable.
Be clear-eyed about the trade-off, though: this is a machine that rewards patience. A few owners hit loose bolts or adhesion trouble out of the crate, and the ones who upgrade to stiffer bed springs or an all-metal extruder report the biggest jump in consistency. Plan on wiping the plate with isopropyl alcohol before every print. The honest read is that this is a starter printer you will learn on, and plenty of owners describe that learning curve as the point.
Straight talk: the print quality owners praise most comes from a machine that wants occasional adjusting, not one that runs itself. The Ender is a strong pick if the process of understanding your printer sounds interesting, and a frustrating pick if it sounds like homework.
The right call for: a patient first-timer who wants maximum learning per dollar and does not mind a wrench now and then.
Not the right call for: anyone who wants push-button printing from the start — the A1 above costs more and saves you that.
3. FLASHFORGE Adventurer 5M 3D Printer, 600mm/s High-Speed, 1 Click Fully Auto Leveling
Bench-top speed with a footprint that fits where a full-size machine will not
FlashForge went after one job here: get you from box to first print in minutes. The listing claims ten minutes from unboxing to printing, and the headline figure is 20,000 mm/s² of acceleration to a 600 mm/s top speed. Being a CoreXY machine — meaning the bed only moves up and down while the toolhead handles both horizontal axes — it keeps the moving mass light, which is how it hits those numbers without the print wobbling.
The engineering details explain the consistency. The nozzle flows 32mm³/s with 50w of heating power, reaching 200°C in 35 seconds, so you are not waiting around for heat-up. Vibration compensation cancels the ghosting artifacts that show up as ripples on a fast-printed wall. Full-auto one-click leveling sorts the bed and first layer without your input. There is a filament run-out sensor and power-loss recovery, so an empty spool or a tripped breaker does not scrap the print. The 0.4mm nozzle runs PLA, PETG, and TPU, and a 0.6mm nozzle opens up PLA-CF and PETG-CF.
Owners who rate it well tend to describe it as a compact workhorse, with performance by far the most-discussed strength. There is a real spread on the other side, though: some units reportedly arrive with a bowed bed or inconsistent extrusion, and the touchscreen is described as finicky in a dim workshop. FlashForge’s own support earns specific credit for shipping a replacement sensor within days. The catch is the build volume — 220 x 220 x 220 mm is genuinely small, so a large prop or a big functional part will need splitting.
Buy it if: you want fast prints from a machine that lives on a crowded desk and sets up in minutes.
skip it if: your projects are bigger than a 220 mm cube — the volume here is the tightest on this list.
4. Anycubic Kobra X Multicolor 3D Printer, Easy Setup, Native 4-Color
Four colors without buying a second box, and an AI camera watching the print
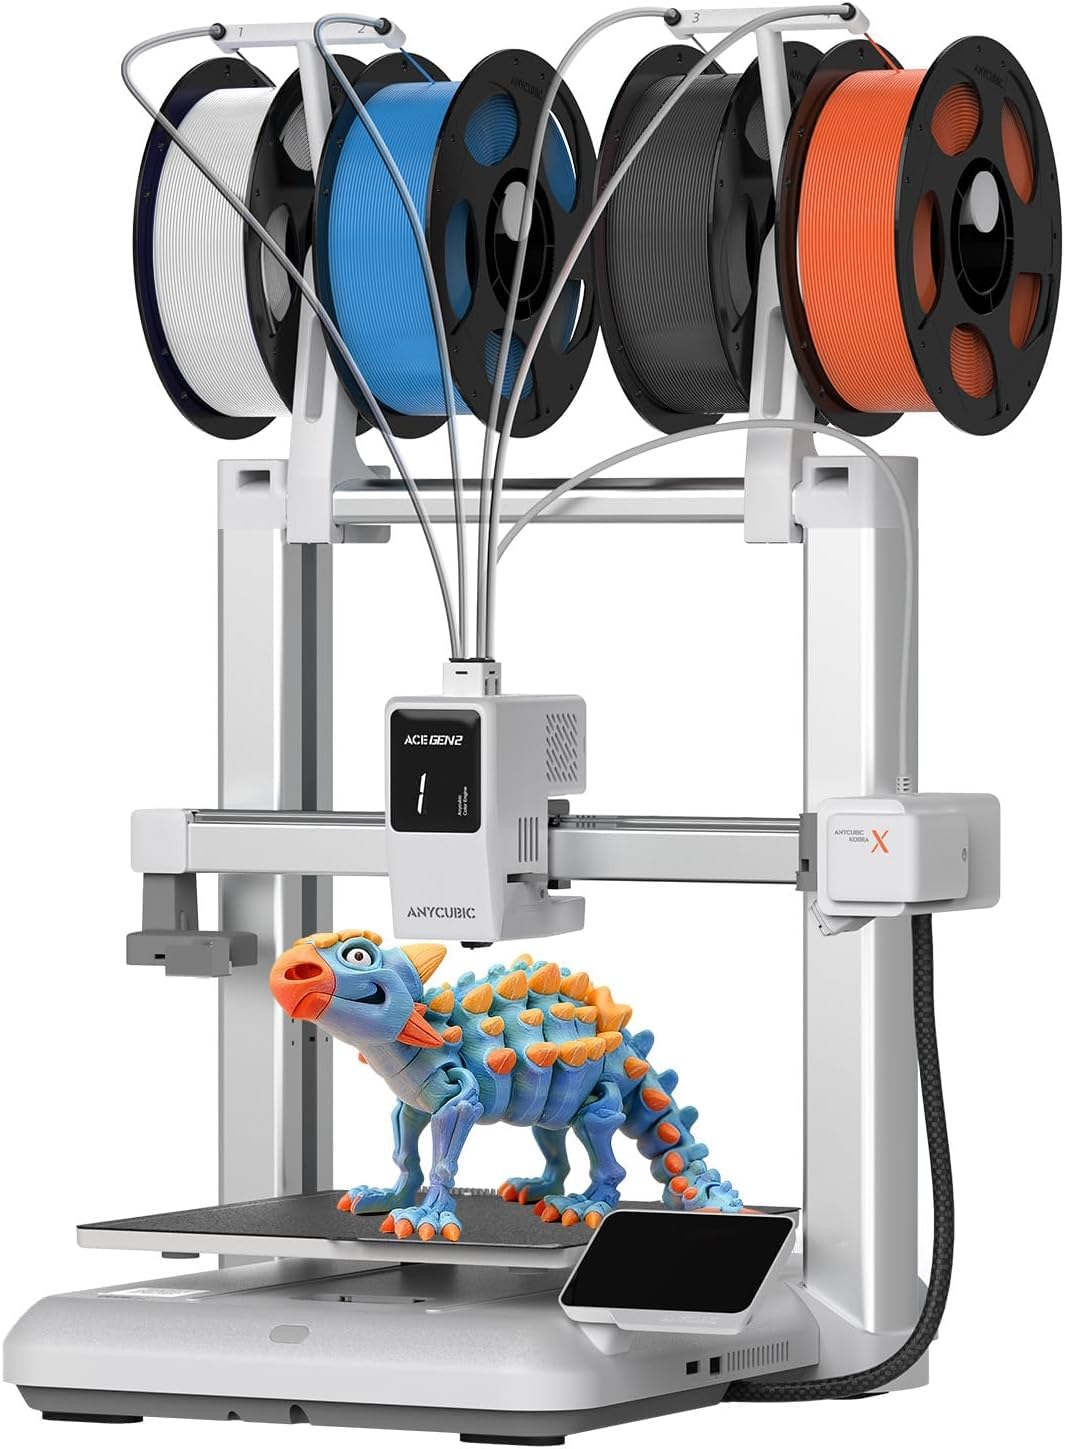
If multicolor is the point of owning a printer for you, this is the machine that builds it in rather than selling it back to you as an accessory. The Kobra X ships with four colors ready to go, and you can expand the palette to nineteen by stacking four ACE 2 Pro units. It also cuts the cost of color: Anycubic claims the design cuts the filament and machine travel path by 81.25%, meaning less purge per color change. Top speed is 600 mm/s, and the brand says a Benchy test model finishes in 14 minutes.
Print quality is the thing that wins people over here — smooth, crisp surfaces with particularly strong results on that benchmark boat. The bed runs a 49-point calibration routine with LevIQ 3.0, which checks the surface across dozens of spots so it does not need the classic paper-shim dance. There is a hardened steel nozzle for durability, vibration compensation for clean layers, and dual-band Wi-Fi on both 2.4G and 5G plus LAN, so it talks to your network either way. Two AI features watch the job: spaghetti detection catches the tangled mess when a print fails, and foreign object detection catches things that should not be in the chamber.
The friction is in reliability over time — some buyers report clogging eventually, and support is the slow part of the experience if something goes wrong. Note also that the four spools in the product photos are display props and are not included, so budget for filament separately. The 260 x 260 x 260 mm volume is generous for the tier and handles PLA, PETG, TPU, PVA, and ASA at up to 300°C.
The draw: built-in four-color printing plus a 49-point bed calibration at a mid-range price, with AI monitoring catching failures while you are out of the room.
The watch-out: long-term durability is where opinions diverge, so keep up with periodic nozzle maintenance.
Made for: makers who want color transitions in the print itself and would rather not bolt on a separate feeder later.
Rethink it if: you want a machine with a track record measured in years rather than months.
5. FLASHFORGE AD5X Multi-Material 3D Printer 4-Color Printing, 600mm/s Speed

Four filaments side by side, a rigid frame, and materials most printers cannot touch
The AD5X is built around its Intelligent Filament System, which holds four spools arranged side by side and switches between them automatically. That setup is what lets it print four colors and blend materials in a single job — PLA, TPU, PETG, SILK, PLA-CF, and PETG-CF. For anyone mixing rigid and flexible sections in one part, that breadth is the reason to consider this machine.
The frame underneath matters just as much. A full-metal CoreXY structure keeps the gantry rigid, and FlashForge’s vibration suppression algorithms hold layer alignment steady so the walls do not shift as the toolhead moves fast. Speed figures match the tier: up to 600 mm/s with acceleration up to 20000mm/s². Full auto leveling measures multiple points across the bed so the first layer sits evenly. The design is modular and compact, with the four spools running in a row to save bench space.
Owners who are happy with it point to build quality and the ease of getting a clean first print, and the physical results come in for real praise. The reliable report on the other side is jamming — multiple owners describe random clogs with certain PLA brands, and a few units arrived with a color misaligned badly enough to need a replacement, which FlashForge did supply. Long multicolor jobs also need some babysitting: the recommendation is to drop the nozzle to around 200°C, keep the bed at 55-60°C, and pop the top lid off to stop PLA softening in the four-in-one tube.
Strengths That Show Up
- Four-spool IFS changes filament automatically for true multicolor and mixed-material prints
- Handles PLA, TPU, PETG, SILK, PLA-CF, and PETG-CF from one machine
- Full-metal CoreXY with vibration suppression keeps fast layers aligned
- Side-by-side spool layout saves desk space versus a stacked tower
The Honest Friction
- Random jams with some PLA brands are a recurring report
- Quality control is uneven — some units arrive needing a straight swap
- Long multicolor PLA runs want a cooler nozzle and the lid off
Choose it if: you want four-color and mixed-material printing without giving up frame rigidity.
Think twice if: you want the most predictable machine on the list — a few units do arrive needing a replacement.
6. ELEGOO Centauri Carbon 2 Combo 3D Printer, Multicolor Printing

Built to be loaded, tapped, and forgotten for hours at a time
The Centauri Carbon 2 Combo is the machine you buy when you plan to run it hard. Its CANVAS system feeds four colors with instant switching, and it watches filament with auto refill and tangle detection so a snagged spool does not silently kill a long job. Speed runs to 500 mm/s with acceleration of 20,000 mm/s², driven by a CoreXY system inside a rigid aluminum frame.
Automation is the pitch, and the spec sheet backs it: fully automated calibration and monitoring mean the workflow is load, tap print, and walk away. Active vibration compensation smooths surfaces, and the temperature control opens the door to engineering-grade materials rather than just everyday PLA. This one earns its build name — the enclosure and frame add real mass, which is why it weighs 42.6 pounds, but that same rigidity is what keeps the walls straight at speed.
Owners who click with it describe a printer that runs for weeks of near-continuous work with no mechanical trouble, and the results across hundreds of hours of PETG and PLA are reported clean. The recurring complaint on the other side is the auto-leveling: while some owners mention it works perfectly, others could not get it to behave, so it is worth running a test print early. Durability is also the most commonly flagged worry, and a small number of units genuinely fail early — one died inside a week, and the fix took a support runaround. Treat that as the risk of buying into a newer platform, not a reason to write it off.
Worth knowing: for buyers who print constantly, the calibration and monitoring automation is the whole value proposition — you stop babysitting and start queueing jobs.
Fair warning: the auto-leveling system is the single most polarizing part, so run a benchmark print in week one and confirm yours behaves before committing to a project.
Best for: a home shop that prints for hours daily and wants automation to do the watching.
Less suited to: someone who wants a quiet printer — the vibration is described as loud.
7. QIDI Q2 3D Printer, 65℃ Heated Chamber and 370℃ Nozzle open up PPS-CF
A 370°C hot end and a warm chamber for parts that have to survive real load
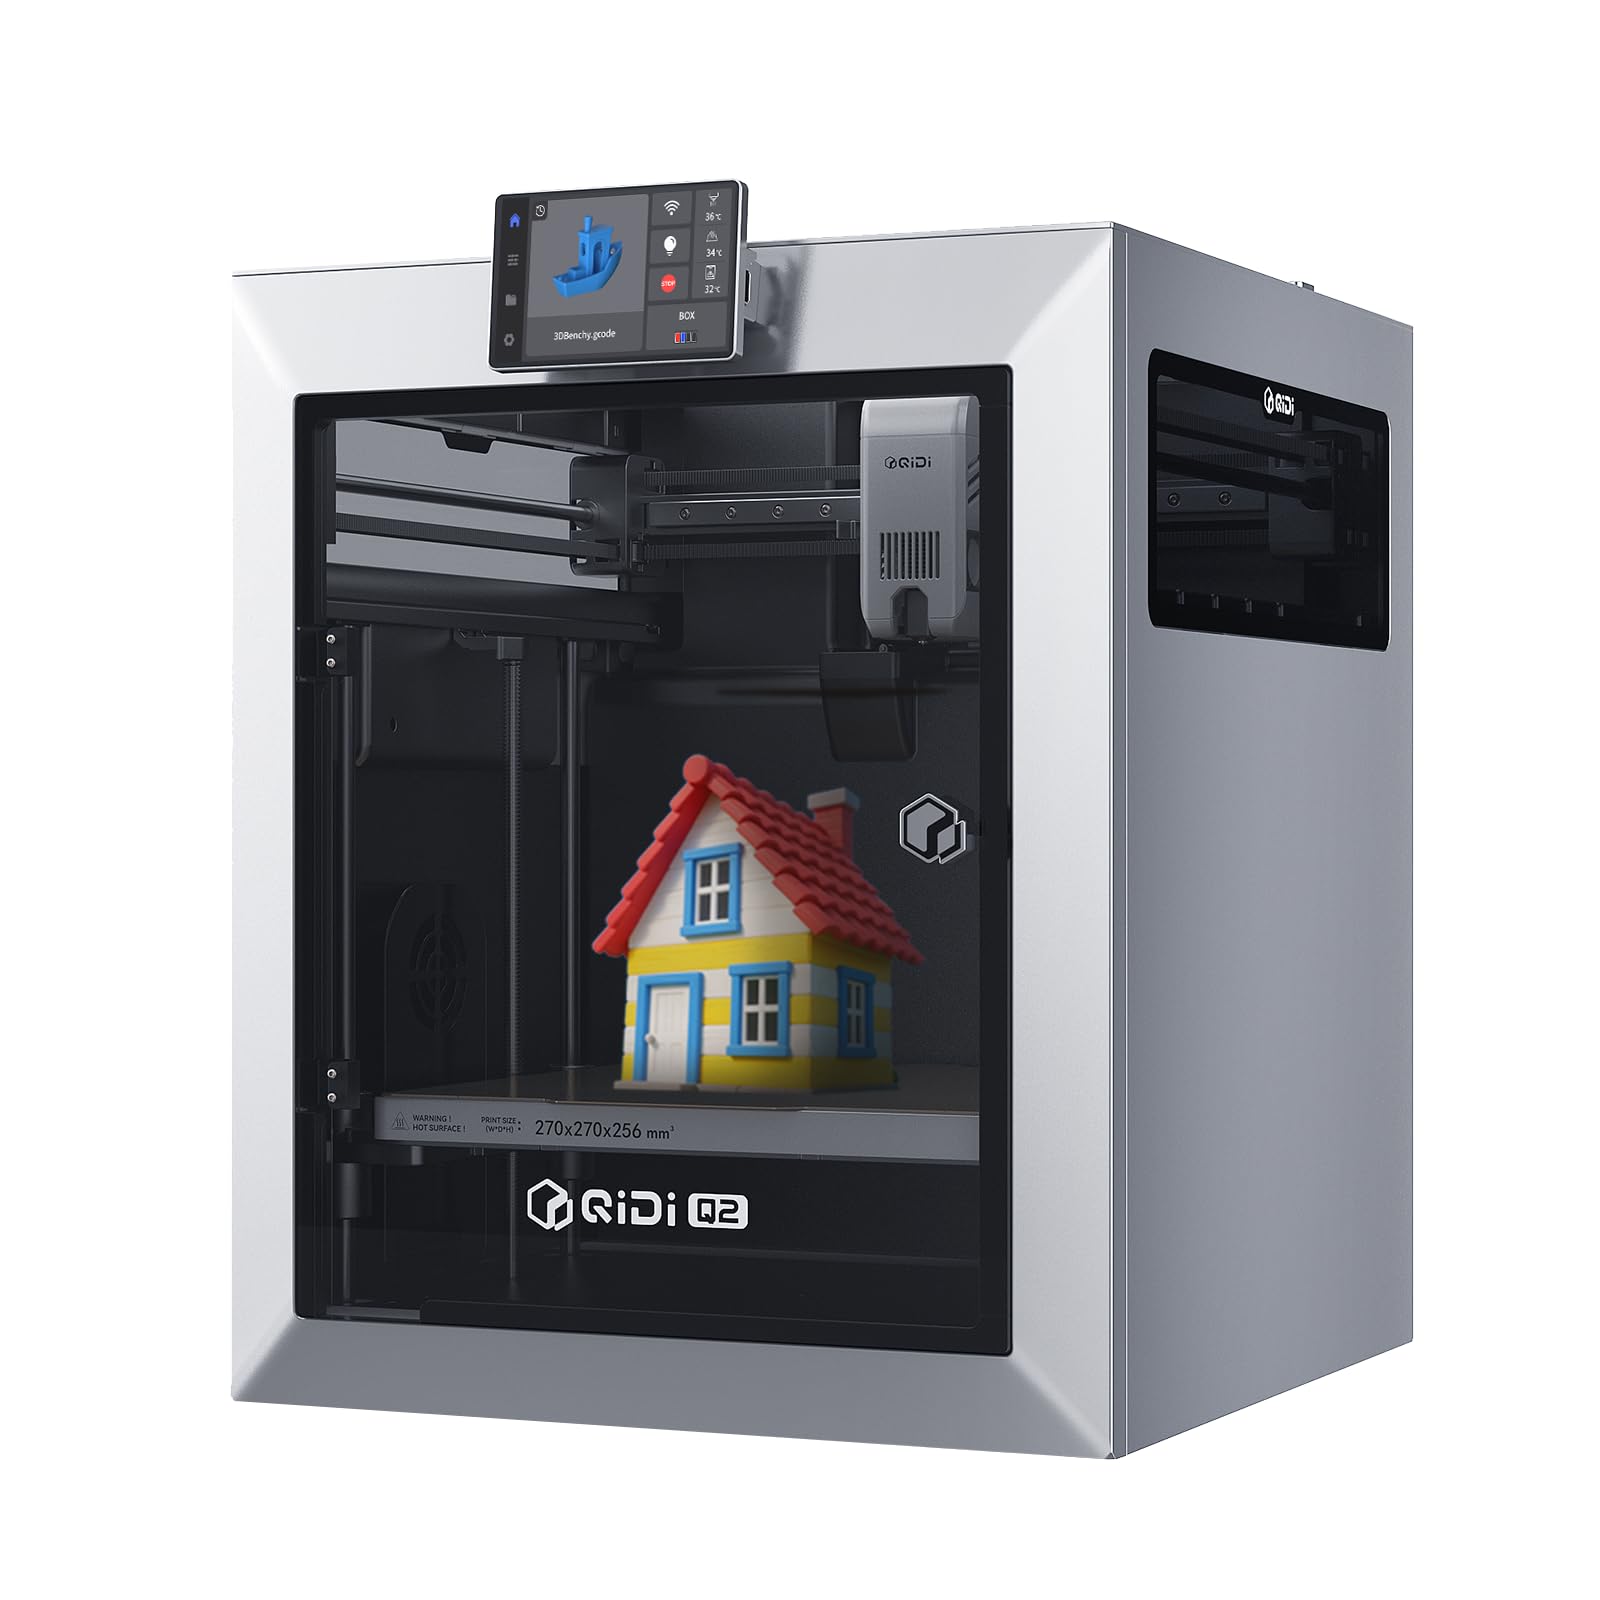
Most hobby printers top out on PLA and PETG. The Q2 is for the other kind of buyer: the one who wants PA-CF, PC, or PPS-CF — carbon and glass-fiber reinforced plastics used for functional parts. A 370°C nozzle and a second-generation PTC heated chamber that reaches 65°C are what make those materials possible, since the warm chamber slows cooling so carbon-fiber parts do not warp mid-print.
The structure backs the temperature. A full-metal CoreXY frame with precision linear rails pushes up to 600 mm/s while holding accuracy, and an upgraded 1.5GT synchronous belt cuts vibration artifacts so surfaces come out smoother. The nozzle doubles as the leveling sensor, which QIDI says gives consistent first-layer accuracy regardless of bed surface. There is also a triple filtration system — a G3 pre-filter, an H12 HEPA layer, and activated carbon — plus multiple sensors, closed-loop temperature control, and a flame-retardant chamber, which is the combination that makes an enclosed printer usable in a living space. Adding a QIDI BOX open up up to 16-color multi-material printing with dry-while-print technology.
Two things to weigh honestly. Print quality is the most-discussed topic among owners and the opinions are genuinely split — some report excellent surfaces, others run into issues — so buy with a test project in mind rather than a deadline. And a few customers note the print head moving erratically, while others find the machine rock solid. The support response is the strongest counterweight: owners consistently describe fast, hands-on help, often diagnosed and parts shipped within a day. Many also print a small riser before serious use to keep the filament tube from rubbing the glass.
The Capability Edge
- 370°C nozzle and 65°C heated chamber reach PPS-CF and other engineering filaments
- Linear rails on a full-metal CoreXY frame hold accuracy at 600 mm/s
- Triple filtration and closed-loop temperature control suit indoor placement
- Up to 16 color with the QIDI BOX and dry-while-print
Worth Budgeting For
- Surface quality draws split opinions, so plan a test print before a deadline
- A printed riser is a common fix for the filament tube rubbing the glass
- Carbon-fiber work benefits from a harder nozzle than the stock one
Pick this if: your parts need to hold up under load and the filament names are PA, PC, or CF-filled.
Look past it if: you only ever print PLA — the chamber and hot end headroom go unused.
8. Bambu Lab P1S Combo, P1S 3D Printer and AMS, Multi-Color 3D Printing
The enclosed combo that made multicolor printing a normal thing to own
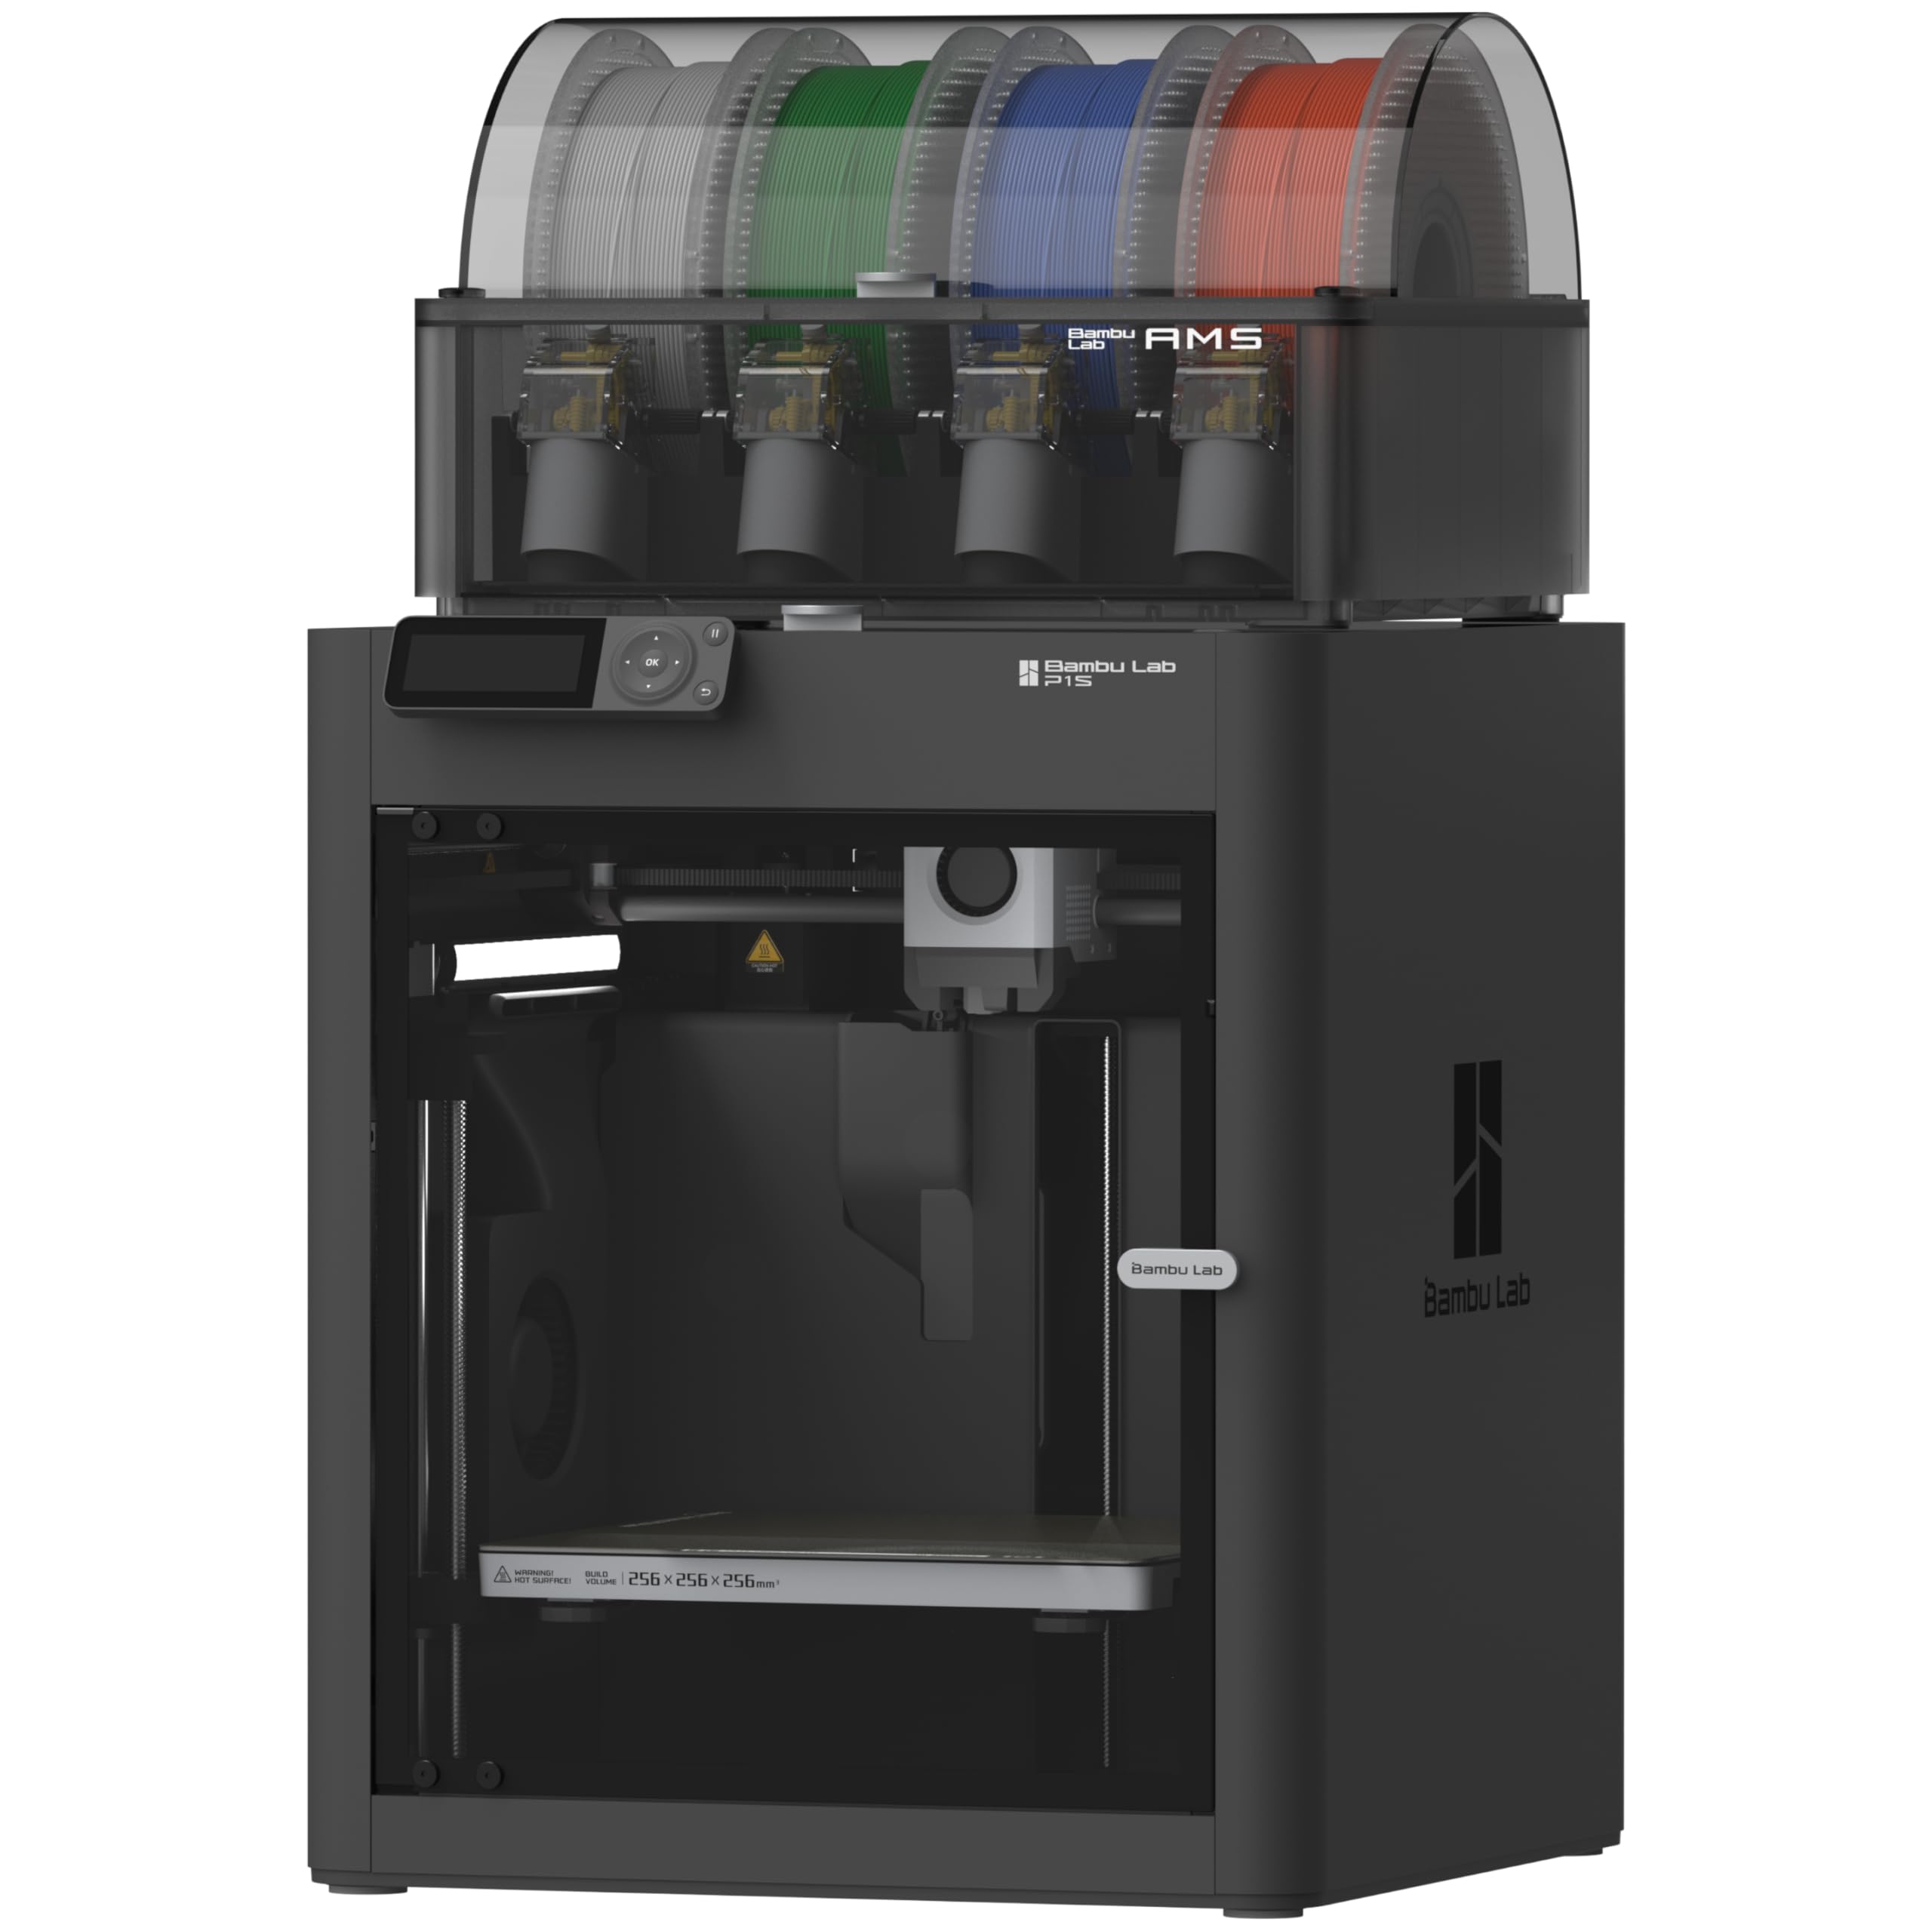
Two specs make this machine what it is: an enclosed body and an included AMS. Because the print volume is closed off, the air around the part stays warmer, so materials like ABS and ASA that would otherwise warp get a fair chance. And because the AMS (the automatic multi-material system) comes in the box, multicolor is a feature you switch on rather than a box you buy later. With additional AMS units chained, the system supports up to 16 colors, and it prints at 500 mm/s with 20,000 mm/s² of acceleration.
The setup story is what keeps people satisfied. The brand says you are printing in 15 minutes, and the automatic bed leveling removes the guesswork that ruins a first print. Performance comes in for the heaviest praise, followed by value for money — for a lot of buyers, the combination of speed and multicolor capability in one purchase is the deciding point. Reviewers point out getting from unboxing to a first print inside a couple of hours and describe the machine as one of the best purchases they have made.
The honest caveats: this printer weighs 47.5 pounds, which is genuinely heavy to lift onto a bench, and a few units reportedly arrive with a broken front handle. Bambu Studio, the slicing software, takes some learning — there is a legitimate curve before printing feels fast. Carbon-fiber and glass-fiber reinforced filaments are not recommended on this machine, so if those materials are your target, look at the QIDI Q2 instead. Worth printing two small accessories early: a waste chute and a filament-stop to keep the purge mess contained.
The core case: an enclosed chamber plus a bundled AMS is a complete multicolor setup in one purchase, which is why value for money ranks so high among owners.
The real cost: it is one of the heaviest machines here at 47.5 pounds and it will not run carbon-fiber materials, so it is the wrong pick for engineering filaments.
Go with this one: if you want multi-color printing included and an enclosed chamber that handles ABS and ASA cleanly.
Pass on it: if your filament plans involve carbon-fiber composites or you need a lightweight machine to move around.
9. Snapmaker U1 3D Printer, 4-Toolhead with 5s Toolchanger, Multi-Color Printing

Four print heads that swap in five seconds, and almost nothing wasted
The U1 solves the dirtiest problem in multicolor printing by sidestepping it. Instead of pulling filament out of one nozzle and purging the mix, it physically swaps between four independent toolheads using the SnapSwap system, dropping tool change time from around two minutes to about 5 seconds. Snapmaker rates the tool-change lock for over 1,000,000 swaps. Because each head keeps its own preloaded, preheated filament, there is no purge between colors — Snapmaker rates the waste reduction and the multicolor speed gain at up to 5X each..
The material freedom is the second payoff. Because there is no single shared nozzle, the U1 can combine rigid and flexible filaments, water-soluble supports, and engineering materials in one print — PLA, PVA, TPU, PETG, PCTG, ABS, ASA, PA, PC, and more. It even handles different Shore hardness TPUs in the same job. A rigid CoreXY motion system with lightweight carbon fiber X-axis rails reaches 500 mm/s across a 270 x 270 x 270 mm build volume. Smart calibration covers toolhead offset, vibration compensation, and first-layer accuracy automatically.
Owners describe near-zero waste on multi-color runs, with long color prints finishing dramatically faster than purge-based machines on the same model. Setup is reported at under twenty minutes with a clear step-by-step booklet, a 3.5-inch touchscreen that explains each calibration, and QR-linked troubleshooting videos. The occasional friction is minor: converting an STL file to G-code is not spelled out clearly, and a few owners noticed slight bottom-layer stringing until they tuned the nozzle settings.
Why Owners Rave
- Four toolheads swap in about 5 seconds each, with over 1,000,000 validated swaps
- No purge between colors means up to 5X less waste on multicolor jobs
- Mixes rigid, flexible, and soluble-support filaments in a single print
- 500 mm/s across a 270 x 270 x 270 mm volume with automatic smart calibration
Minor Gripes
- STL-to-G-code conversion guidance is unclear for new users
- Slight bottom-layer stringing shows up until nozzle settings are tuned
Stands out for: anyone printing multicolor models regularly and tired of paying for it in purge waste.
Overkill for: single-color work — the tool-changing system you are paying for would sit idle.
10. Original Prusa MK4S Kit High-Speed DIY Professional FDM 3D Printer
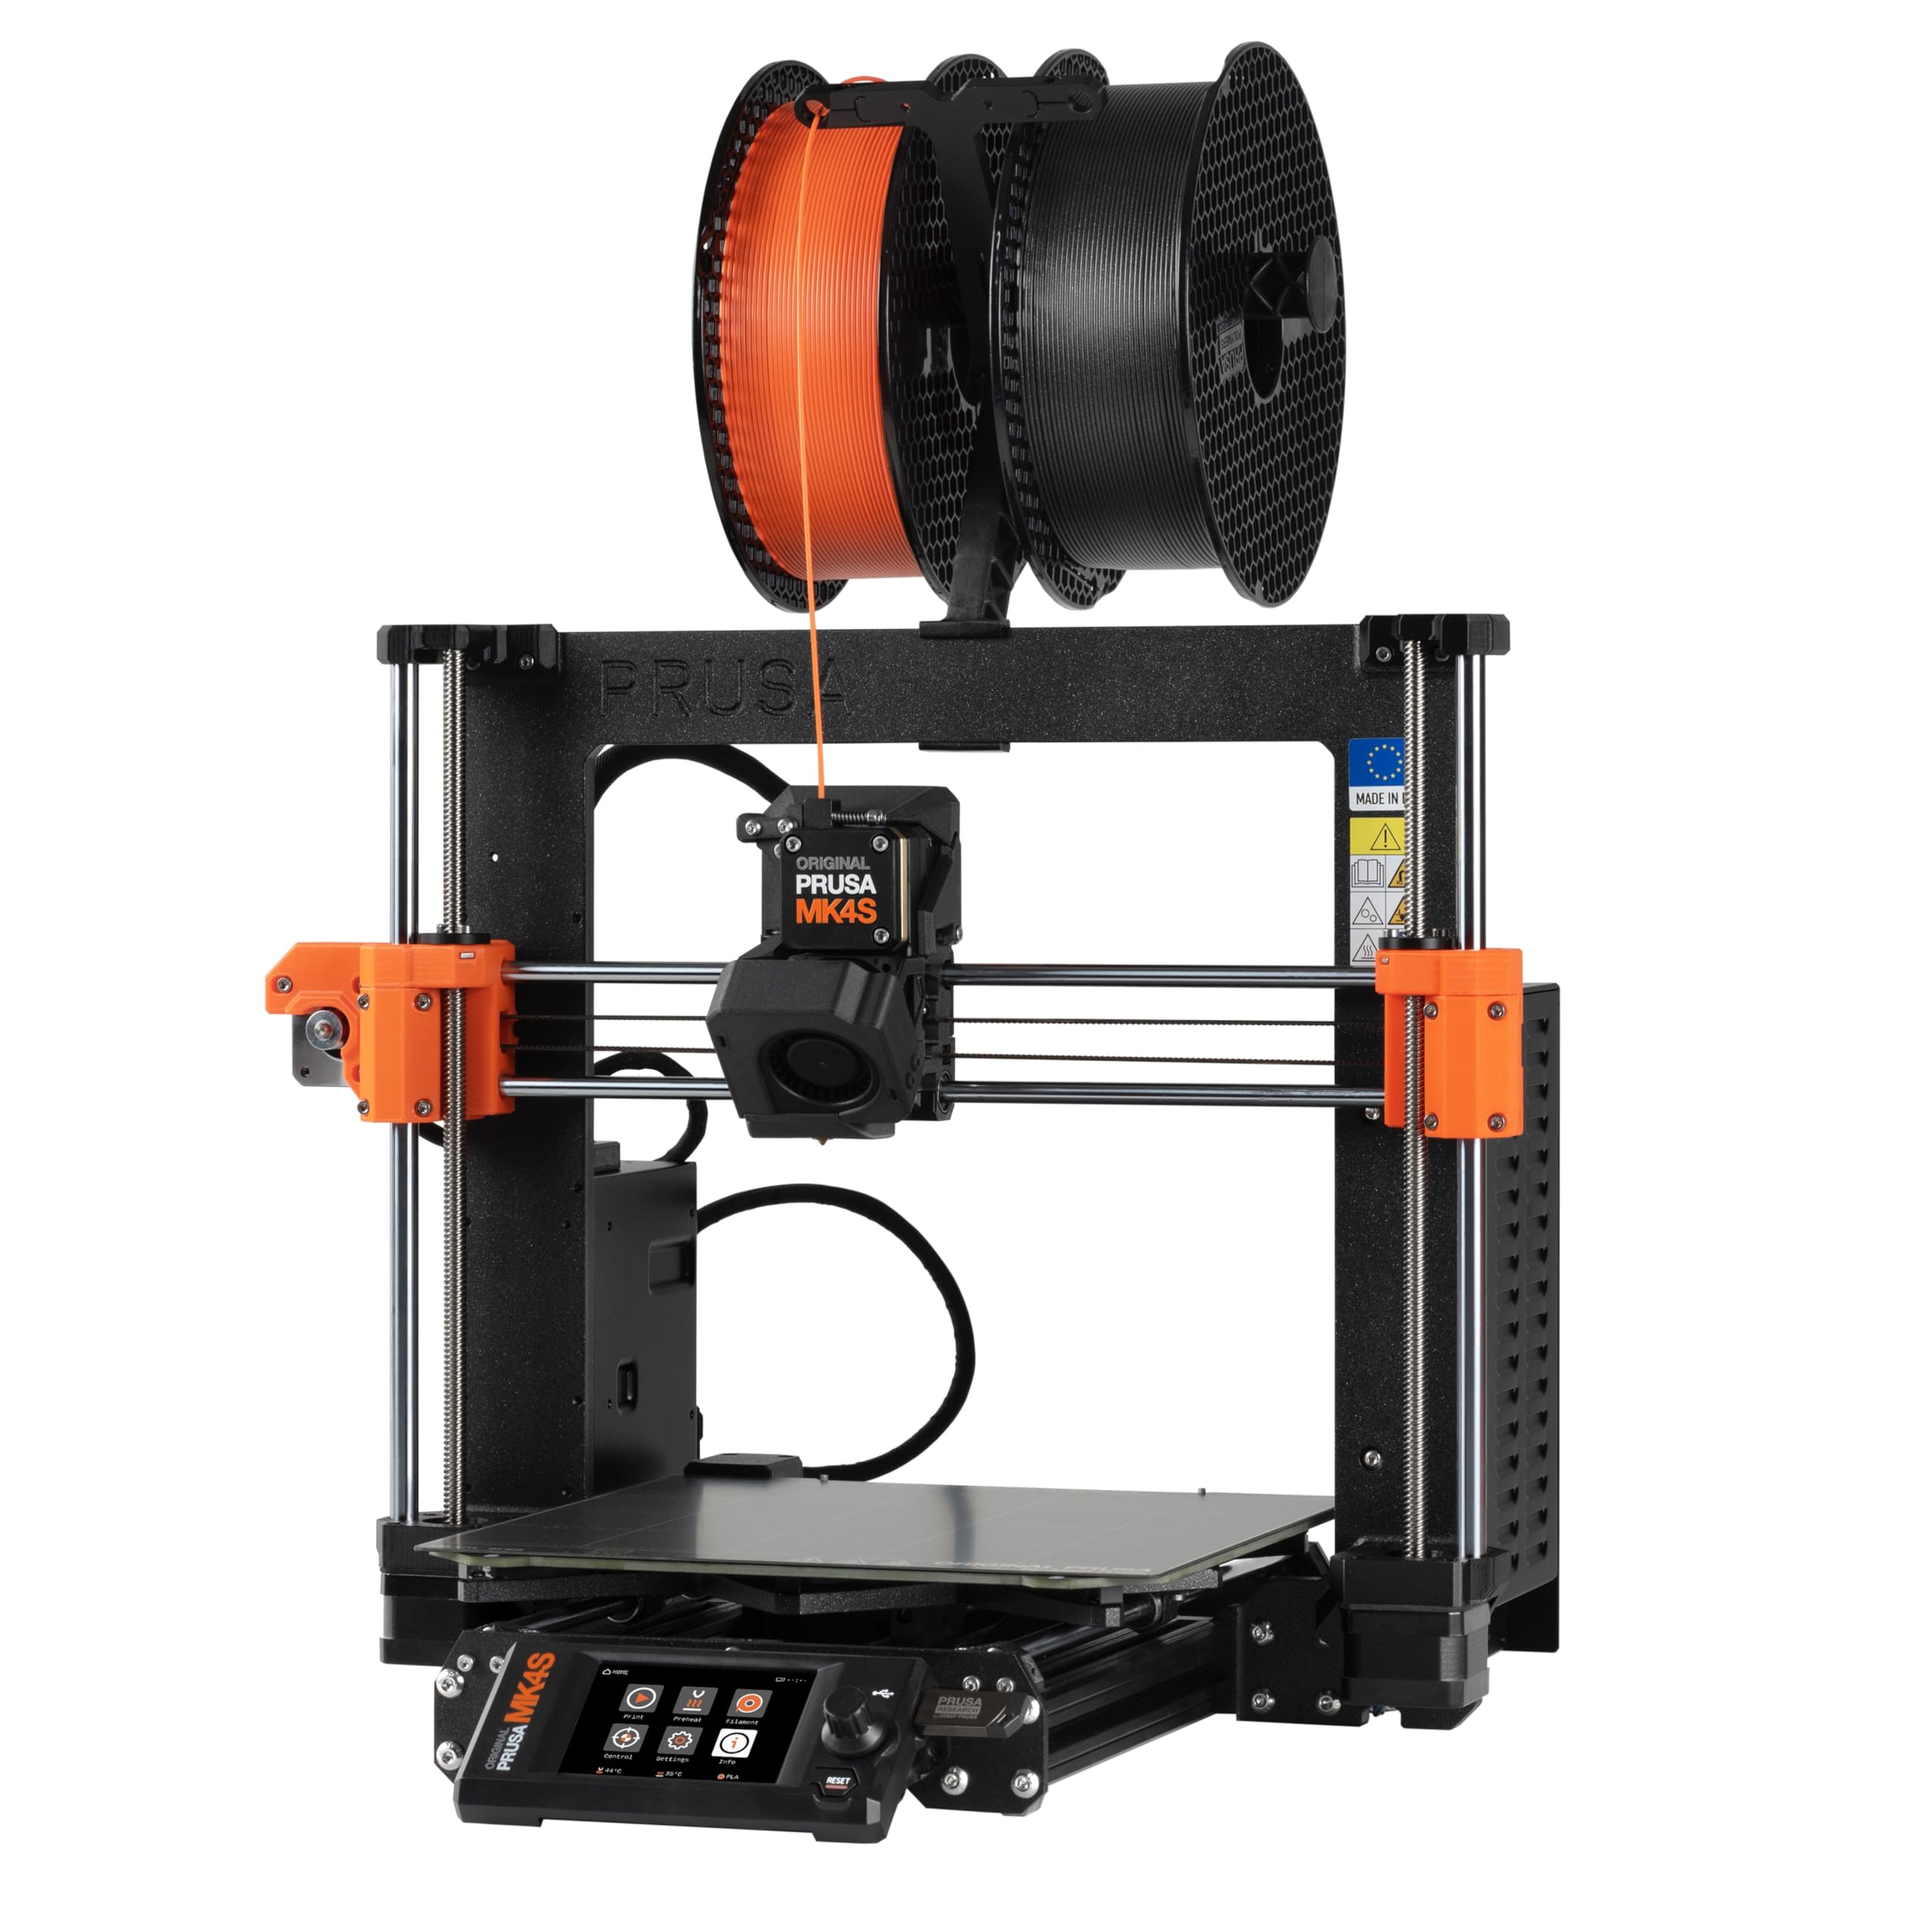
You build it yourself, and that is the entire product, not a compromise
This machine comes as a kit you assemble from scratch, and the print size is 9.84 x 8.3 x 8.6 inches — modest by the standards of the large-format machines above, but deliberately so. What you get in return is a printer whose internals you understand, because you bolted every one of them in. The design is fully open source with long-term firmware support and modular hardware, so parts stay available and upgrades stay possible years down the line.
The assembly experience is the real division among buyers. Owners who enjoy it describe fourteen hours across two days of building with well-written instructions and a finished machine that calibrated successfully on the first attempt. Others find it genuinely challenging, and that split is honest — the assembly is the barrier to entry here. What nobody disputes is the result: print surface quality and engineering consistency that owners say cheaper machines cannot match, helped by input shaping (motion control that cancels ringing and vibration for sharp edges at higher speeds). It comes with a sample of Prusament PLA and lifetime technical assistance.
Two practical notes. If building a machine sounds like a chore, buy an assembled printer instead — that is not a knock on this one, it is the honest fit question. And a small number of kits have arrived missing a part, which is a shipping reality for any kit with hundreds of pieces; Prusa does include spares for exactly this reason.
Who it rewards: the tinkerer who wants to understand input shaping, belt tension, and extrusion at a mechanical level — and get a machine with genuinely excellent surface finish as a result.
Who should pass: anyone whose idea of a good purchase is taking a printer from the start and pressing start.
Right for you if: the assembly itself is half the appeal and you want an open, upgradeable platform.
Wrong for you if: you want to be printing within an hour of the delivery arriving.
11. Creality K2 Plus Combo 3D Printer, Multi Color Printing with CFS 600mm/s High-Speed
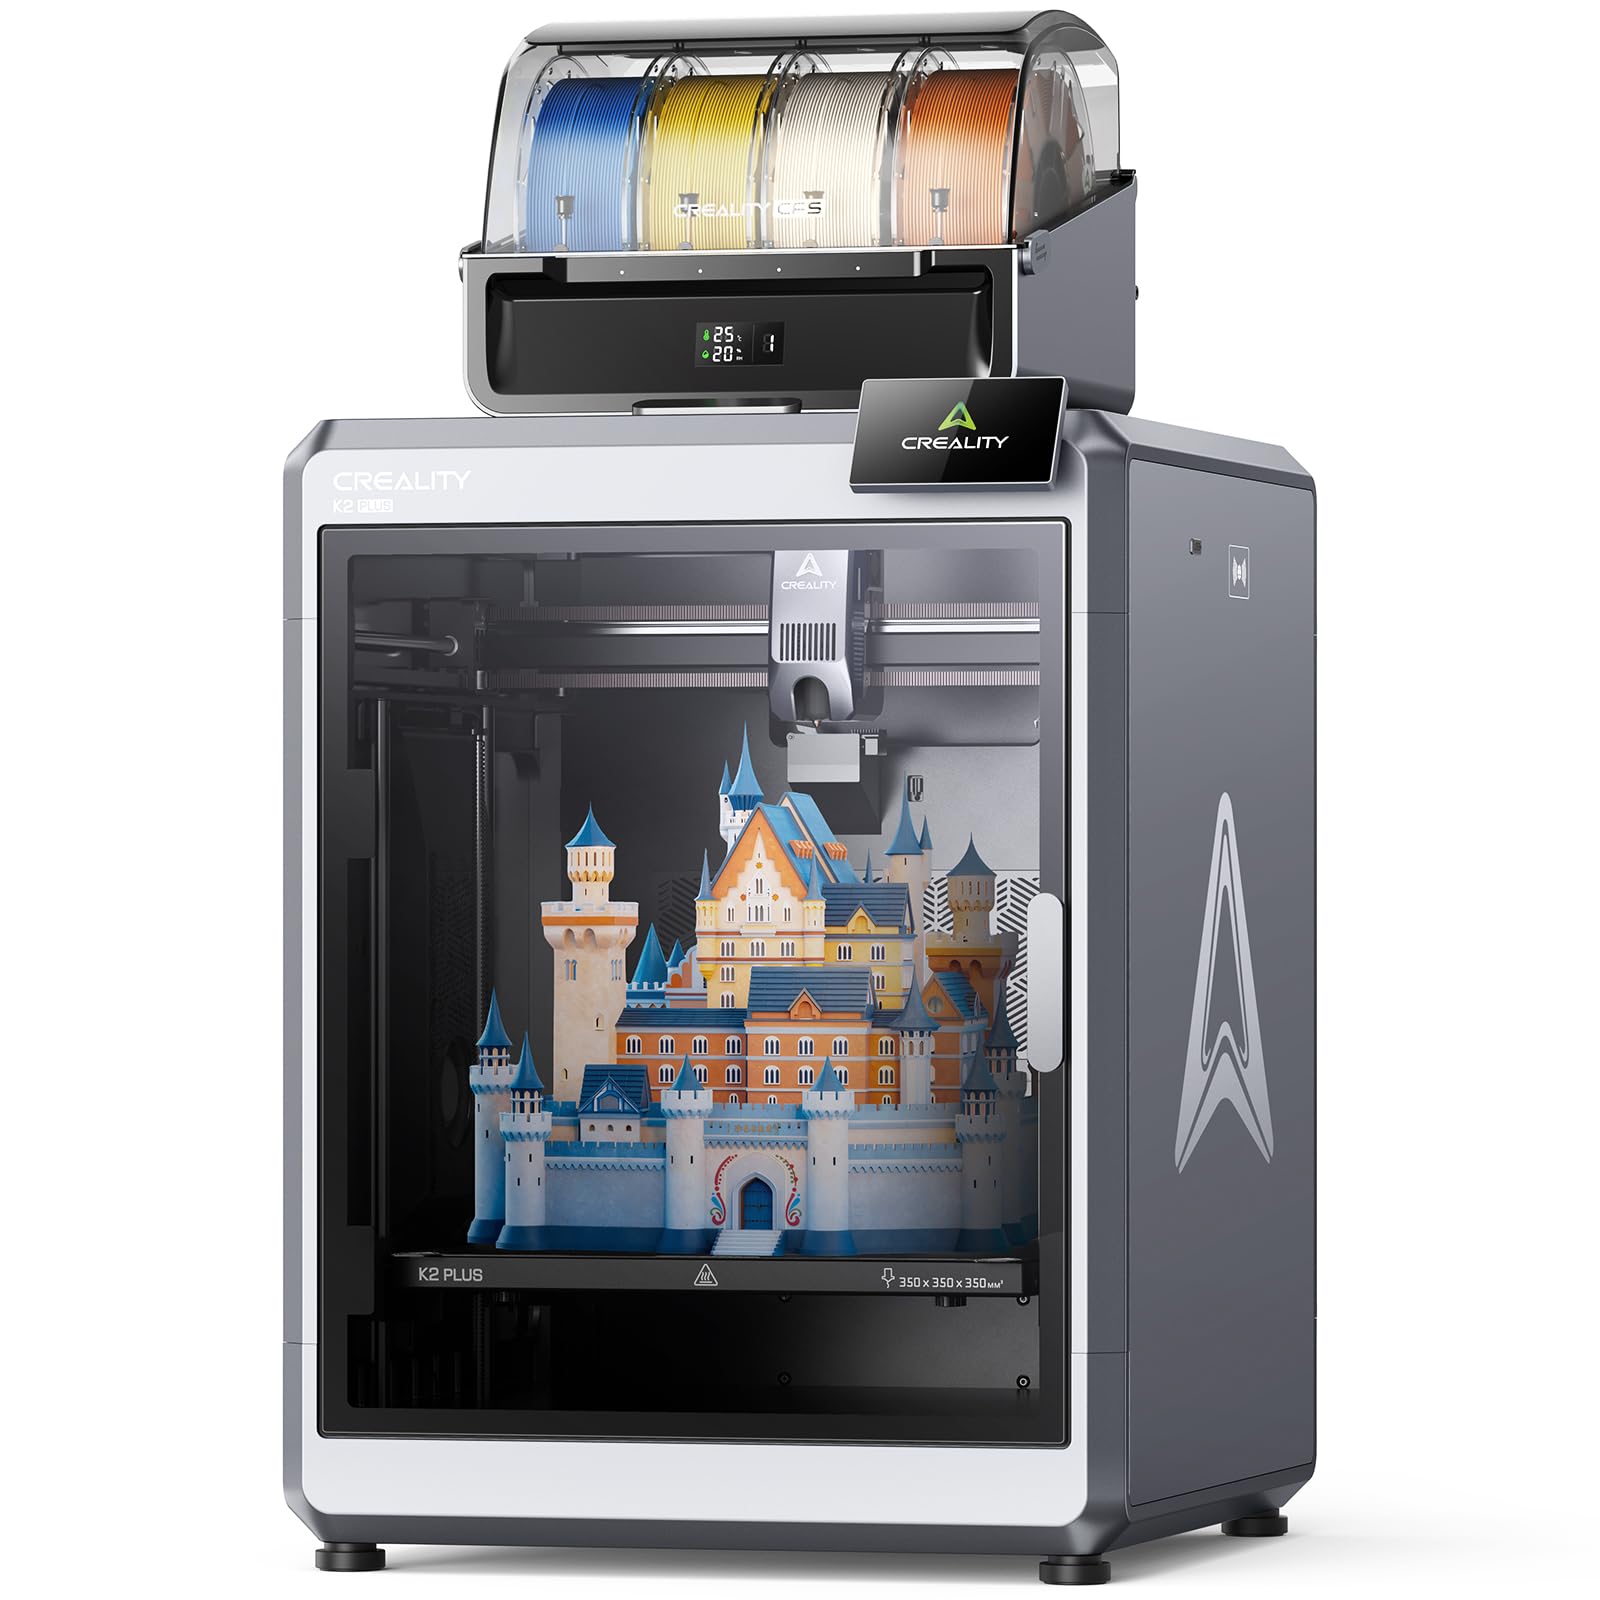
A 350 mm cube of build space and a 60°C chamber for the biggest jobs
When the part simply does not fit, this is the machine that ends the discussion. The K2 Plus Combo offers a 350 x 350 x 350 mm build volume — far beyond the 220 mm Adventurer 5M and the 270 mm Snapmaker U1 above — so large models print in one piece instead of being split and glued. It is powered by step-servo motors on all axes that push acceleration to 30,000 mm/s² with a 600 mm/s top speed and 40mm³/s flow.
The material range comes from the heat, not just the size. The chamber holds a constant temperature up to 60°C so ASA and PPA print warp-resistant and strong, and the hardened steel nozzle runs to 350°C for high-melting-point engineering filaments. A dual Z-axis system on four linear rods keeps the big bed moving steadily on vertical travel, and the “Matrix” frame of aerospace-grade aluminum alloy die-casting holds rigidity so resonance does not creep into large parts. The CFS multi-color system holds four spools and chains up to four units for 16-color printing, reading RFID filament tags to identify color and type on load and relaying to a similar spool when one runs out.
The automation is where Creality packed in the sensors — 18 of them, monitored continuously. Two AI cameras split the job: one watches the chamber for spaghetti failures and idle states, the other rides the toolhead to fine-tune flow rate so there is no under- or over-extrusion. Two independently motorized Z-axes auto-adjust bed tilt before leveling even starts.
Owners running it hard report a genuinely reliable workhorse, one long-term owner logged 1,421 hours of flawless printing. The recurring friction is the transition between material families: switching from PLA or PETG to ABS tends to clog the nozzle, and the workaround owners settle on is a dedicated ABS nozzle. A few units also arrive damaged, and it weighs 70.4 pounds, so it takes two people to lift. If your projects are big enough to need the volume, those are acceptable terms.
Built For Scale
- 350 x 350 x 350 mm volume prints large models in one piece
- 60°C chamber and 350°C hardened nozzle open up ASA and PPA
- 30,000 mm/s² acceleration with 40mm³/s flow at 600 mm/s
- Dual AI cameras plus 18 sensors monitor the job automatically
Managing The Trade-Offs
- Switching from PLA or PETG to ABS tends to clog the nozzle
- At 70.4 pounds it takes two people to position
- A few units arrive damaged in transit
The pick for: large-format printing where a single-piece helmet, prop, or big functional part is the whole point.
Too much machine for: desk-sized projects — you would pay for volume and chamber heat you never use.
Understanding the Specs
Acceleration and Top Speed
Top speed in mm/s is the fastest the toolhead can travel; acceleration in mm/s² is how quickly it gets there. On small models the toolhead is always starting and stopping, so acceleration drives the finish time, not the top number. A machine rated at 20,000 mm/s² reaches speed and slows for corners far quicker than one rated at 2,500 mm/s². When two printers list similar top speeds but very different acceleration, expect the higher-acceleration machine to finish small parts noticeably sooner.
Nozzle Temperature and Heated Chamber
The nozzle temperature sets which filament you can melt. Everyday PLA runs around the low 200s Celsius, while engineering materials like PPS-CF need a 370°C nozzle. A heated chamber is the second half of the equation: keeping the air around the part at 60°C or 65°C slows cooling so warp-prone materials stay flat. If your printing stays on PLA and PETG, you will likely never use either feature.
Build Volume
Build volume is the three dimensions the nozzle can reach — width, depth, and height. A 220 x 220 x 220 mm machine covers most figures and brackets; a 350 x 350 x 350 mm machine prints a full-size prop in one piece. Bigger beds take longer to heat and add moving mass, so pick the volume your actual projects require and no more.
Multi-Color Systems and Purge Waste
A multi-color system swaps filament to change color mid-print. Purge-based designs pull the old filament, push in the new, and eject the mixed material into a waste bin, which costs both filament and time. Tool-changer designs swap whole print heads instead, cutting that waste substantially. If multicolor is central to your work, the waste handling is the number to study before buying.
FAQ
What does FDM mean and how is it different from resin printing?
Do I need a heated chamber to print ABS and ASA?
How much filament do I waste changing colors?
Is assembly difficult on these printers?
What build volume do I actually need for helmets and cosplay parts?
Can these printers run TPU and other flexible filaments?
What is the difference between CoreXY and a moving-bed design?
How often does a nozzle need replacing?
Do I need to enclose a printer for indoor use?
What does auto leveling actually do?
Final Thoughts: The Verdict
For most people buying their first fused-deposition machine, the 3d fdm printers winner is the Bambu Lab A1, because it handles its own calibration, runs quietly with motor noise canceling, and lets a child operate it — a combination no budget machine matches. If your projects are large enough to need a single-piece print, reach for the Creality K2 Plus Combo and its 350 x 350 x 350 mm volume and 60°C chamber. And if multicolor waste is the thing that has been holding you back, the Snapmaker U1 and its 5-second tool change is the one to look at. Whichever way you go, buy around the materials and part sizes you actually print — an unused 370°C nozzle or a dusty heated chamber is money that would have been better spent on filament.
How We Picked
We do not accept paid placement. Every pick is matched to a real buyer and a real use-case; we do not hands-on test units.
Sources & Methodology
Specifications: manufacturer listings and product documentation. Review insights: verified customer reviews, as of September 2026. Pricing: not shown on this page (it changes often); check the current price via the retailer link.
As an Amazon Associate, Gadgets Feed earns from qualifying purchases. This does not affect which products we feature.