
Our readers keep the lights on and my morning glass full of iced black tea. As an Amazon Associate, I earn from qualifying purchases.
Specs are compiled from manufacturer listings and verified buyer reviews and can change over time — please confirm the key details on the product page before buying.
You want a 3D printer that turns a student’s idea into a real object without eating a whole class period in troubleshooting. A reliable machine keeps lessons engaging, while a finicky one derails the entire class period. We’ve selected models that balance ease of use with enough capability for meaningful student projects.
I’m Min — the founder and writer behind Gadgets Feed. This guide is built by comparing the manufacturers’ published specifications and the patterns across verified customer reviews, so you get each pick’s real strengths and trade-offs instead of marketing spin.
After weighing build volume, speed, safety features, and how much hand-holding each machine offers, we have ranked the top models to help you choose the right 3d printer for education for your budget and skill level.
Our Picks at a Glance


How To Choose The Best 3D Printer For Education
Buying a printer for a school or a young maker means prioritizing reliability over raw specs. Prioritize reliability—each failed print wastes class time and discourages young makers. Choose features that prevent common failures, not just impressive specs.
Prioritize Auto Leveling and Setup
Auto bed leveling eliminates the most common cause of first-layer failures. Manual leveling—adjusting screws and paper under the nozzle—is a classic source of first-layer failures that confuses beginners. Look for “auto bed leveling” or “full-auto calibration” in the specs; these systems probe the build plate and adjust the nozzle height automatically, so a student can start a print with confidence.
Match Build Volume to Your Projects
Match the build volume to your planned projects, not the largest possible number. A small build volume like 3.9″ x 3.9″ x 3.9″ is fine for toys and small prototypes but limits larger projects like helmets or big articulated figures. A larger volume, such as 260mm x 260mm x 260mm, gives you the freedom to tackle bigger designs, but it also takes up more desk space. Consider the classroom’s physical layout before committing to a large frame.
Understand the True Cost of Multi-Color
Multi-color systems differ greatly in waste and cost, so weigh the trade-offs carefully. Traditional single-nozzle systems with a filament switcher purge waste material between color changes. Newer systems with multiple independent toolheads swap the entire print head instead, cutting waste dramatically. Decide if the extra cost and complexity are worth it for your students, or if a single-color printer with manual mid-print color swaps is enough.
Quick Comparison
| Model | Best For | Max Speed | Build Volume | Weight | Amazon |
|---|---|---|---|---|---|
| Bambu Lab A1★ Best Overall | Reliable beginner workhorse | 10,000 mm/s² accel | — | 22 pounds | Amazon |
| Entina Tina2CBest for Young Kids | Kids’ first printer | — | 3.9″ cube | 11.62 pounds | Amazon |
| Creality K2 SETop Performer | Large build, multi-color | 500 mm/s | 220 × 215 × 245 mm | 27.5 pounds | Amazon |
| FLASHFORGE Adventurer 5M | Rapid prototyping speed | 600 mm/s | 220x220x220 mm | 23.8 pounds | Amazon |
| Anycubic Kobra X | Native multi-color on budget | 600 mm/s | 260 mm cube | 20.9 pounds | Amazon |
| Bambu Lab P1S | Enclosed printing for ABS | 500 mm/s | 260mm³ bed | 38.9 pounds | Amazon |
| QIDI PLUS4 | Engineering materials | — | 12 x 12 x 11 in | 59.4 pounds | Amazon |
| Snapmaker U1 | Zero-waste multi-color | 500 mm/s | 270 mm cube | 59 pounds | Amazon |
In‑Depth Reviews
1. Bambu Lab A1 3D Printer
Our pick — over 4.5★ from 600+ verified ratings; the strongest balance of quality and price.
A reliable workhorse that lets young students print independently.
This is the printer that keeps a young maker independent. The A1 handles all calibration automatically—bed leveling, Z-offset, the works—so a child can set up a print without calling for help. Buyers report kids as young as ten using it solo, and the active motor noise canceling keeps the whir down to a background hum, which matters when it sits in a shared study or library space.
What makes it a genuine standout is the blend of speed and reliability. With an acceleration of 10,000 mm/s², prints finish in a fraction of the time older machines need, yet owners note the quality stays high. The 1-Clip quick swap nozzle makes maintenance a two-second job, and the flow rate compensation algorithm smooths out extrusion inconsistencies automatically. Buyers transitioning from older Creality machines describe it as a massive upgrade that removes the constant fiddling they used to tolerate.
Multi-color is an option, not a requirement, which keeps the entry cost sensible. The AMS lite system open up vibrant multi-color prints, but you buy it separately or as part of the Combo package. At 22 pounds, it is a solid, stable frame that does not slide around the desk at speed, and the simplified touchscreen interface means there is no software learning curve before the first lesson.
Why It Wins Over Its Rivals
- Full-auto calibration removes the #1 beginner failure point
- Quiet operation lets a whole room work in peace
- 1-Clip nozzle swap makes maintenance easy
- Owners praise the speed and low upkeep after months of daily use
Things to Weigh First
- Assembly feedback is mixed—most find it easy, some hit minor errors
- Multi-color requires the separately sold AMS lite
- Closed-source software gives some owners pause, though reliability wins them over
Grab it for: a school, makerspace, or family where you want the highest chance of a successful print on the very first day. The reliability here is the thing everyone raves about.
Think twice if: you must have multi-color from the start without buying the AMS lite add-on, or if open-source software is a hard requirement for your curriculum.
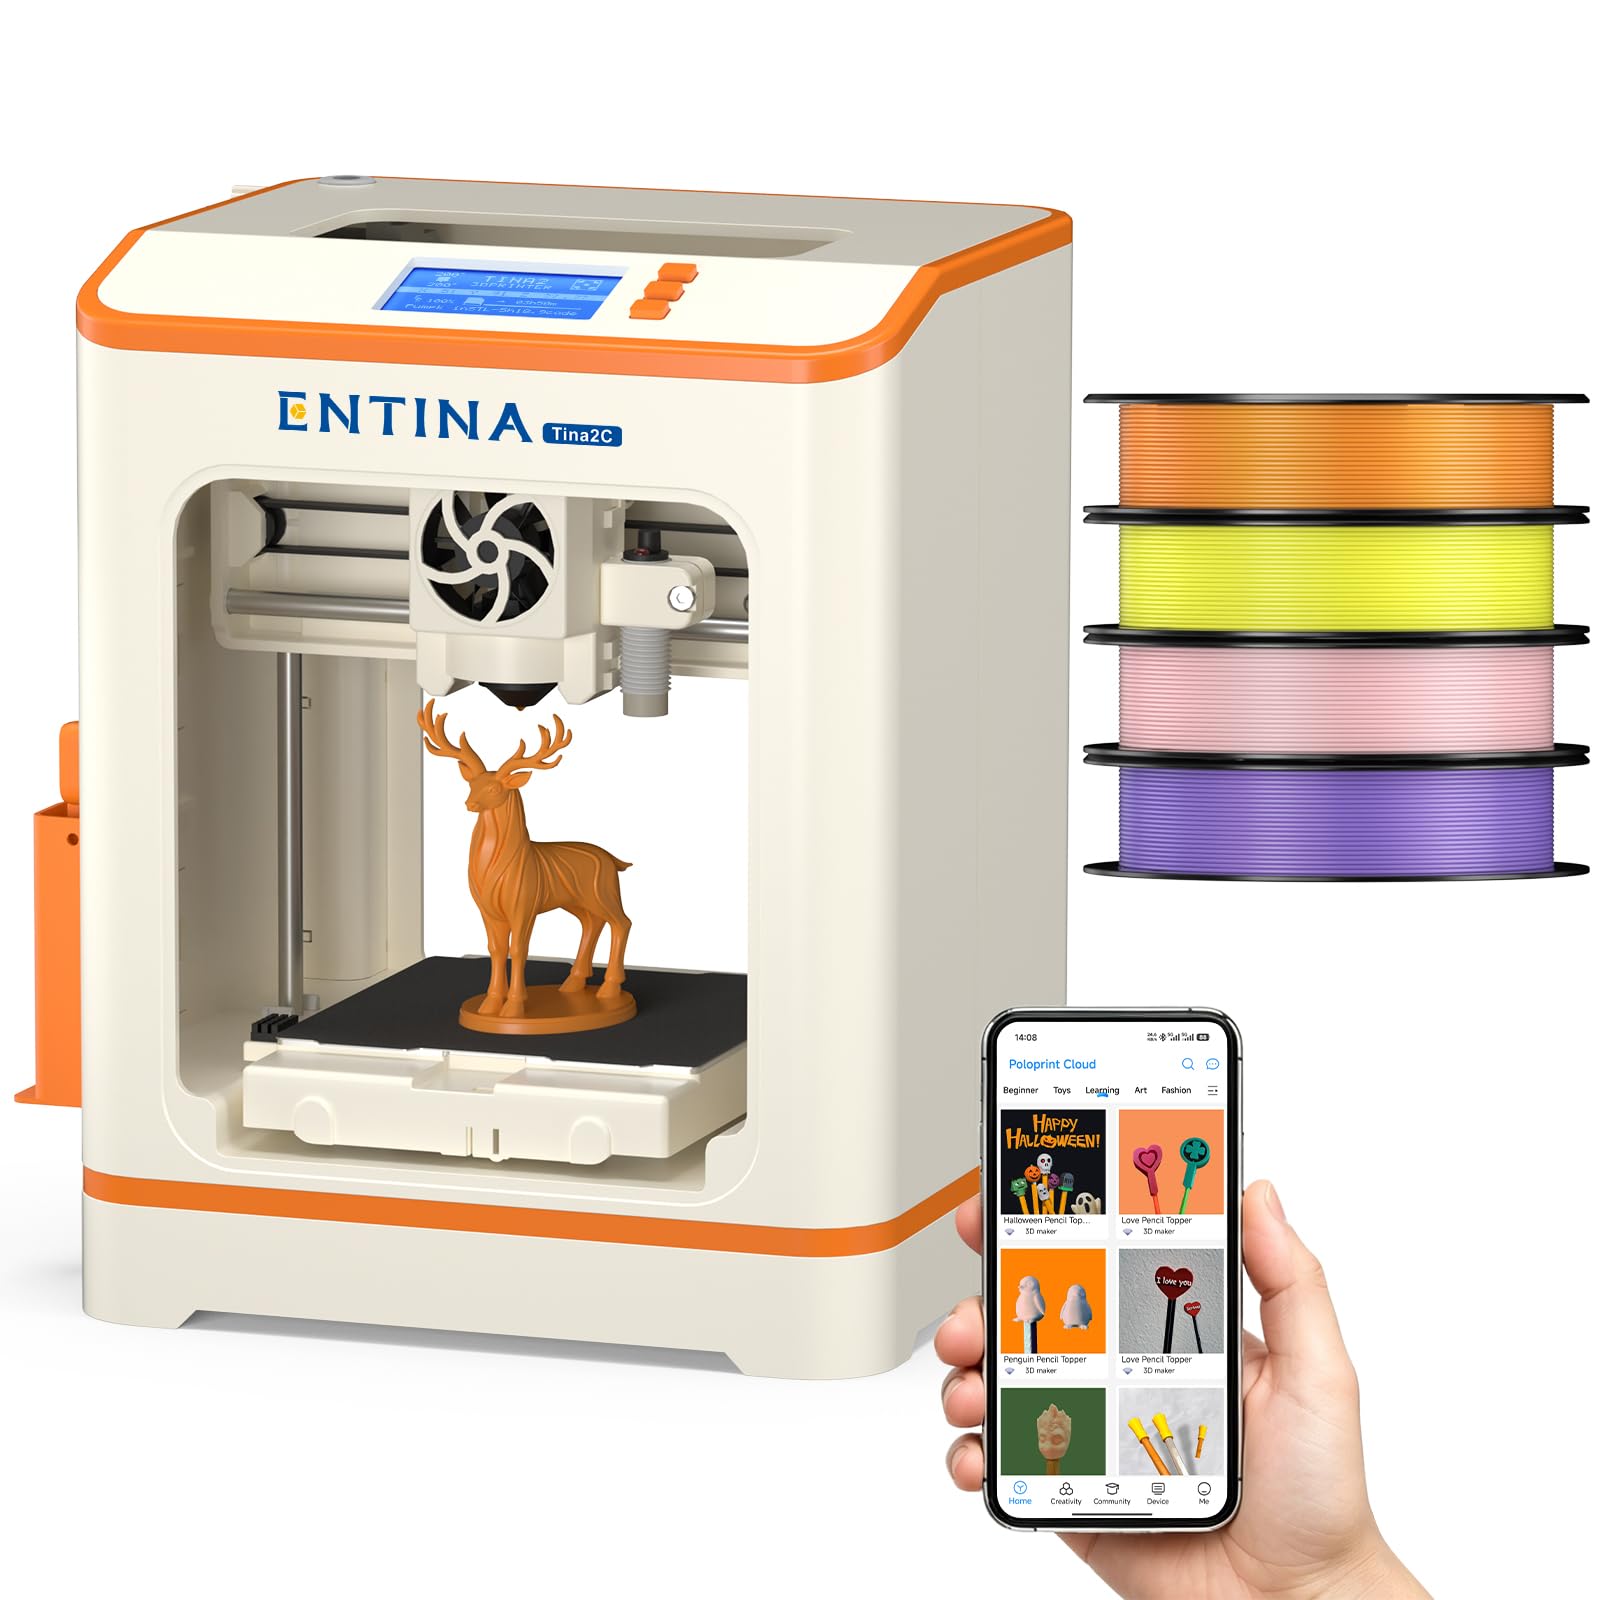
2. Entina Tina2C Mini 3D Printer Bundle
A tiny frame that turns a child’s morning into a surprise reveal.
The Tina2C arrives fully assembled, which is the best possible starting point for a young beginner. There is no wrench work or confusing build guide—just unbox, load filament, and start. It comes with four different PLA colors totaling about 1kg, so the very first project can happen minutes after opening the box, and the guided setup walks a child through the Poloprint app.
This is the lightest machine on this list at 11.62 pounds, and it is dramatically smaller than the Bambu Lab A1—a 1.9x difference in footprint. That compact size means it fits easily on a bedroom desk or a small classroom table. Owners talk about kids going to bed and waking up to a fresh printed surprise every morning, which captures the magic that keeps young minds engaged for weeks on end.
The 3.9″ x 3.9″ x 3.9″ build volume is small, but that is fine for the toys, keychains, and small prototypes this machine is designed for. Auto leveling and power-loss recovery (so a print resumes after an interruption) keep the workflow simple. The magnetic build plate lets you pop a model off with a simple bend, and the quick-swap nozzle makes cleaning up a non-event.
Best first step: For a child aged roughly seven and up, this is the gentlest introduction to 3D printing. The video tutorials and responsive customer support that owners praise make it feel like a guided experience, not a solo struggle.
The honest limit: A few owners have received units that printed everything out of alignment and had to be returned, so check the first print carefully. If your projects outgrow a 3.9-inch box quickly, you will want a bigger machine.
3. Creality K2 SE 3D Printer
A rigid metal frame built for fast, multicolor classroom projects.
The K2 SE is built like a tank, and that rigidity shows in the print quality. The die-cast aerospace-grade aluminum alloy frame, reinforced with gussets and crossbeams, minimizes vibration so the 500 mm/s high-speed printing still produces smooth surfaces. The smart auto leveling only probes the active print area, which makes setup noticeably faster than systems that scan the entire bed.
Multicolor is the headline feature here. The K2 SE accepts one Color Filament System (CFS) with four spools, and you can connect up to four CFS units to print in as many as 16 colors. Note that the CFS is sold separately, so the multicolor capability is an added investment. The direct-drive extruder’s filament run-out sensor and automatic magnetic cutter keep filament changes smooth and dependable.
For educators, the 220 × 215 × 245 mm build volume is a versatile middle ground—big enough for functional parts and educational models, compact enough to live on a desk. Creality Cloud integration adds a layer of convenience, letting you manage prints remotely. Owners upgrading from older Ender models describe it as far less fussy, though they advise keeping the included glue stick handy as a release agent on the magnetic bed.
Built to Print Fast
- Smart auto leveling probes only the active area for faster setup
- Up to 16 colors with multiple CFS units
- Rigid frame cut vibration and ringing for cleaner layers
- Owners running it 24/7 for months report zero issues
Know Before You Buy
- CFS unit sold separately—multicolor is not out-of-the-box
- Some owners mention instability and clogging, so build quality is mixed
- Glue stick needed as release agent for some prints
Choose it for: a classroom that wants a fast, large-format machine and is ready to invest in the separate CFS system for multicolor projects. It is a solid step up for those who have outgrown a basic printer.
Look elsewhere if: you want a single, all-inclusive price with multicolor ready to go on day one, or if you prefer a quieter, more compact footprint than this 27.5-pound frame offers.
4. FLASHFORGE Adventurer 5M

A CoreXY speed demon that goes from unboxing to printing in 10 minutes.
If class time is tight, the Adventurer 5M is the machine that respects the bell schedule. Its CoreXY design hits a maximum speed of 600 mm/s with acceleration up to 20,000 mm/s²—reaching full speed from a standstill in just 0.025 seconds. The one-click fully auto leveling and a 10-minute unboxing-to-first-print path mean a lesson on design can start and finish within a single period.
The 220x220x220 mm build volume is a standard, versatile size that handles most educational projects without hogging the desk. Vibration compensation kills the ghosting effect (blurred edges on printed parts) that plagues fast printers, and the 280°C quick-detachable nozzle covers a wide filament range. The dual-sided PEI coating plate gives models a strong grip during printing but releases easily when cool.
It is a capable all-rounder for beginners. Owners highlight the easy setup, fast connection, low noise, and stable XY design, and they praise the responsive tech support when issues arose. The flexible removable PEI steel plate handles PLA, PETG, and TPU with a 0.4mm nozzle, and even PLA-CF and PETG-CF with a 0.6mm nozzle. The filament run-out sensor and power-loss recovery protect long classroom prints from wasted effort.
The speed demon’s edge: For schools where multiple students queue for one machine, the speed means more completed projects per day. Owners describe flawless use even a year in, with an easy 10-minute setup.
The trade-off: Print quality draws mixed feedback—while many get great results immediately, some report adhesion issues and failing prints, so follow the instructions carefully and consider third-party slicing software for the best control.
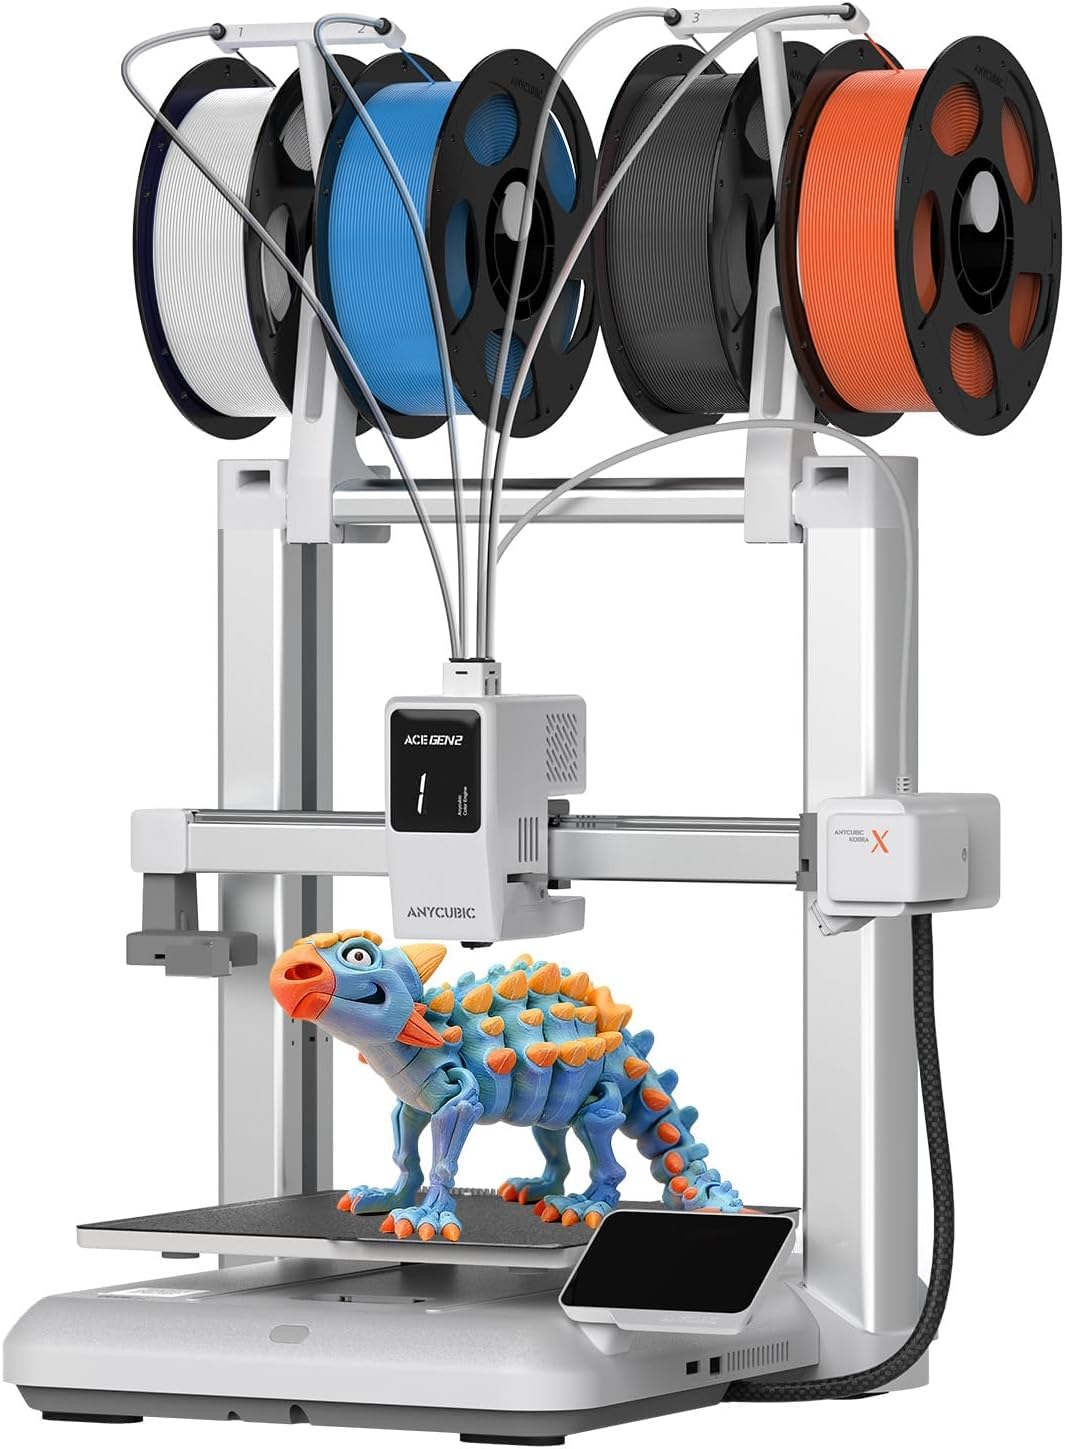
5. Anycubic Kobra X Multicolor 3D Printer
Native four-color printing without the purge-tower waste of older systems.
The Kobra X earns its spot in a makerspace because it makes multicolor printing simple and efficient. It comes with four colors built in, and you can expand the palette up to 19 colors by adding four ACE 2 Pro units (each is an additional filament feeder). Unlike traditional systems that purge filament between color changes, the Kobra X reduces the filament and machine travel path by 81.25%, so you get roughly twice the speed and cut material costs in half—meaning more prints per class period and less waste.
The 260mm x 260mm x 260mm build volume is one of the largest on this list, giving students room to create sizable articulated models and functional parts. The LeviQ 3.0 auto bed leveling uses a 49-point calibration to ensure flatness, and the hardened steel nozzle resists wear from abrasive filaments. It is ready to print 15 minutes after pickup, and the top-mount spool holder frees up desktop space.
For classroom safety and management, the built-in AI monitoring is a genuine asset. Spaghetti detection (catching a failed, stringy print) and foreign object detection alert you to problems via the Anycubic app before a print wastes hours. The dual-band WiFi with 2.4G/5G and LAN connectivity lets you monitor live status remotely, which teachers will appreciate during a busy period.
Why It Engages Students
- Native 4-color printing cuts waste and speeds up multicolor jobs
- AI camera detects spaghetti failures and foreign objects
- Large 260mm cube volume handles big articulated projects
- Customers note 265 hours in a month with only one user-caused failure
Consider This First
- Reliability and bed adhesion draw mixed feedback—first prints can fail
- Some reviewers point out clogging issues and frustrating support
- Multi-color expansion needs the separately sold ACE 2 Pro units
Reach for this if: you want budget-friendly multicolor with a large build area and the safety net of AI monitoring. It is a great fit for a makerspace with students eager to print colorful, complex models.
Look elsewhere if: you cannot risk first-print failures. This machine rewards patience and careful setup; a more simple to use single-color machine may suit a very young classroom better.
6. Bambu Lab P1S 3D Printer

The enclosed workhorse that prints ABS safely in a busy classroom.
The P1S earns its premium reputation through sheer consistency. Its fully enclosed body is the key differentiator here—it traps heat to keep advanced filaments like ABS from warping while also containing fumes, a real safety consideration for a classroom full of kids. Owners consistently praise how easily it prints both PLA and ABS with minimal effort, which is a rare combination in a single machine.
Speed and acceleration are flagship-grade at 500 mm/s and 20,000 mm/s², making the P1S one of the fastest enclosed printers available. Set up takes about 15 minutes, and auto bed leveling handles the delicate first-layer work automatically. The 260mm³ bed gives you a generous canvas for larger educational models, and the network printing capability means teachers can send jobs from a central computer.
The P1S is a step up from the A1 in both price and capability. It handles a wider range of filaments—ideal for PLA, PETG, TPU, PVA, PET ABS, and ASA, and capable with PA and PC. Owners coming from older machines describe it as burying their previous printer in both speed and quality, with a premium, rigid build that feels solid on the desk. The auto-leveling and filament pause/resume functions make long overnight prints stress-free.
The enclosed advantage: For schools working with ABS or ASA, the P1S is the safer, more reliable choice. Owners note the vent doors let you open it for PLA and close it for ABS to manage temperatures.
The setup reality: While quick (under 30 minutes), the P1S is heavier at 38.9 pounds, so plan for a sturdy, permanent table spot. Rare adhesion failures from a dirty build plate are the main gripe—a quick wipe before big prints solves it.
7. QIDI PLUS4 3D Printer

A heavyweight built for engineering-grade materials and advanced classrooms.
The PLUS4 is for a different kind of educational setting—one where students are prototyping functional parts out of serious materials. Its second-generation active chamber heating system uses a 400W heater to maintain a consistent 65°C chamber temperature, which dramatically reduces warping and cracking when printing high-temperature filaments. This is the machine for advanced capstone projects, not daycare keychains.
The upgraded 80W high-temperature hotend with a multi-metal integrated throat nozzle reaches a scorching 370°C. That opens the door to a wide range of engineering filaments including PPS-CF, PPA-CF/GF, ABS, ASA, PC, PA, and PET. The large 12 x 12 x 11 inch print size allows multiple models at once, boosting efficiency for a whole class. Owners praise the print quality and the stainless construction, calling it a quality machine that arrives packaged exceptionally well.
Precision engineering carries through the motion system. An independent dual motor-driven Z-axis, a 6mm thickened aluminum hot bed, and 10mm diameter lead screws increase strength and flatness for high-precision prints. The built-in HD camera offers real-time remote monitoring and time-lapse photography through the QIDI mobile app, and filament wrap and break detection reduce wasted material.
Advanced Capability
- 370°C nozzle opens up high-temp engineering filaments
- Heated 65°C chamber prevents warping on large ABS parts
- Giant 12-inch print size handles multiple models at once
- Owners call the print quality amazing and the assembly straightforward
Heavy Considerations
- At 59.4 pounds, this is a permanent fixture, not a portable machine
- Auto-leveling has mixed reports—some units need z-offset adjustments
- Durability draws some negative feedback, so inspect the unit on arrival
Pick this for: high school or college engineering programs that need to print functional parts in advanced materials. The heated chamber and high-temperature nozzle are the standout tools your curriculum can build around.
skip it if: your students mostly print PLA toys. The power, weight, and price are overkill, and the leveling quirks will frustrate younger beginners.
8. Snapmaker U1 3D Printer

Four independent toolheads that swap in five seconds and waste almost nothing.
The U1 reimagines multicolor printing with a hardware-first approach, so you avoid the slow purging that wastes filament. Instead of a single nozzle that purges between colors, the SnapSwap system uses four independent toolheads, each with filament preloaded and preheated. The automatic tool changer swaps heads in just five seconds, cutting the traditional two-minute changeover dramatically—so you can switch colors mid-print without losing a whole lesson. The sturdy locking mechanism has been validated through over 1,000,000 swaps with zero failures, so it is built to take the abuse of a busy classroom.
The efficiency gains are dramatic. Traditional multicolor systems waste material and time by purging; the U1 swaps heads instead, reducing filament waste by up to 5X and enabling up to 5X faster multicolor printing. Shoppers say near-zero waste and no “poop chute” to empty. It also handles true multi-material prints—combining rigid and flexible materials, water-soluble supports, and engineering plastics in a single job, which opens notable project possibilities for advanced students.
Despite the complexity, it remains accessible. Snapmaker Orca, a custom open-source slicer, makes getting started easy, and the built-in model library gives beginners a head start. The 3.5-inch touchscreen, AI-powered print monitoring, and remote app control simplify the workflow. With a 500 mm/s CoreXY motion system and lightweight carbon fiber X-axis rails, it maintains accuracy across a large 270 x 270 x 270 mm build volume.
The Zero-Waste Advantage
- 5-second tool changer eliminates purge waste entirely
- True multi-material printing: rigid, flexible, and soluble supports in one job
- Near-zero waste cuts filament costs for frequent class projects
- Owners call it the most efficient multicolor printer they have used
Before You Commit
- Not as plug-and-play as some rivals—you need to import into the slicer
- At 59 pounds, this is a heavy investment on both budget and desk space
- Noise level is mixed; some find it moderate, similar to the P1S
Reach for this if: multicolor projects are a core part of your curriculum and you want to minimize filament waste and boost efficiency. It is the top-tier choice for a well-funded makerspace.
Look elsewhere if: you need a simple, set-and-forget machine for very young kids. The U1’s speed and tool-changing sophistication are best appreciated by students who can handle a slicer and plan complex multi-material prints.
Understanding the Specs
Acceleration vs. Max Speed
Speed is a headline number, but acceleration decides how quickly a printer reaches that speed. A machine with 20,000 mm/s² acceleration gets up to full speed fast, which cuts total print time significantly for small, detailed objects. Higher acceleration also tests the frame’s rigidity—a flimsy frame will vibrate and blur the print quality when moving fast.
Build Volume Size
This is the maximum size of object you can print, measured in millimeters or inches (e.g., 220mm x 220mm x 220mm). A larger volume gives you freedom for bigger projects like helmets or articulated figures, but it takes up more physical space. Match the build volume to your planned projects, not to the biggest possible number.
The Multicolor Waste Problem
Traditional single-nozzle multicolor systems purge or flush the old filament color out between swaps. This creates waste and slows prints. Newer four-toolhead systems like the Snapmaker U1 swap the entire toolhead, so there is no purge and almost no waste. If you print multicolor often, this efficiency difference changes your material budget.
Auto-Leveling Systems
Auto bed leveling probes the build plate and adjusts the nozzle height automatically for a perfect first layer. This removes the most common beginner frustration—manual leveling with screws and paper. Systems use varying numbers of probe points (for example, 49 points) to map the bed surface and compensate for any slight warps.
Enclosed vs. Open Frame
An enclosed printer traps heat inside the build chamber. This is essential for printing ABS and ASA, which warp and crack as they cool unevenly. An open frame is fine and often cheaper for PLA and PETG, the most beginner-friendly materials. If you only print PLA, an open frame is sufficient; if you want ABS, you need an enclosure.
Nozzle Temperature Range
The maximum nozzle temperature dictates which materials a printer can melt, so it directly affects what you can create. A 280°C nozzle handles most common filaments (like PLA and ABS); a 370°C nozzle is required for advanced engineering materials like PPS-CF and PPA-CF (carbon-fiber reinforced plastics). Higher temperature capability usually means a more sturdy hotend design and higher cost, so choose based on whether your students need basic models or industrial-grade parts.
FAQ
What is the safest 3D printer for a classroom with young kids?
How long does it take to set up a printer for a classroom?
What is the best build volume for a school project?
Is a multicolor printer worth the extra cost for education?
What is the difference between auto leveling and manual leveling?
Can students print in materials other than PLA?
How does printer weight affect where I can put it?
What are the main causes of print failures in a classroom environment?
Final Thoughts: The Verdict
For most classrooms, the 3d printer for education winner is the Bambu Lab A1 because full-auto calibration and quiet operation remove the biggest barriers to a successful first print for a young maker. If you want enclosed printing for advanced materials like ABS, grab the Bambu Lab P1S. And for a well-funded makerspace focused on efficient multicolor, the Snapmaker U1 is the one to reach for. The crowd favorite—the A1—holds a 4.6-star score across 600+ owners, making it the safest bet to spark a lifelong interest in creating.
How We Picked
We do not accept paid placement. Every pick is matched to a real buyer and a real use-case; we do not hands-on test units.
Sources & Methodology
Specifications: manufacturer listings and product documentation. Review insights: verified customer reviews, as of September 2026. Pricing: not shown on this page (it changes often); check the current price via the retailer link.
As an Amazon Associate, Gadgets Feed earns from qualifying purchases. This does not affect which products we feature.