That frustrating ritual—twisting knobs, sliding paper, and hoping for a perfect first layer—is the single biggest bottleneck holding back consistent 3D printing. An auto bed leveling sensor replaces guesswork with precision, using a triggered probe or an inductive field to map every corner of the build plate in seconds. The right sensor turns a finicky hobby into a set-and-forget workflow.
I’m Min — the co-founder and writer behind Gadgets Feed. I spend countless hours dissecting technical specifications, cross-referencing firmware compatibility matrices, and evaluating how each sensor’s repeatability, temperature stability, and mounting versatility translate into real-world print reliability.
After poring over hundreds of user reviews and manufacturing data, this guide ranks the most dependable options to help you upgrade your workflow with the right auto leveling sensor for 3d printer.
How To Choose The Best Auto Leveling Sensor For Your 3D Printer
Not all sensors play nice with every motherboard or firmware. Before you buy, you need to match the probe to your machine’s architecture—checking voltage requirements, pinout compatibility, and whether the sensor is designed for Marlin or Klipper. A sensor with stellar reviews will still fail if it doesn’t match your board’s bit-depth or requires an adapter you don’t have.
Probe Type: Physical vs. Contactless
The classic BLTouch uses a metal pin that physically deploys to touch the bed—works on any surface (glass, PEI, wood) but the pin is a consumable. Inductive and eddy-current sensors never touch the bed, so there’s nothing to wear, but they only work on metallic surfaces. If you print on glass, a physical probe is your only contactless-compatible option out of the box.
Repeatability and Precision Tolerances
Manufacturers quote repeatability values like ±0.003mm or ±0.0005mm. That number is the standard deviation across multiple probes of the same point. Lower is better—a sensor that can’t repeat within 0.01mm will produce a mesh that oscillates, leading to uneven first layers. The best budget-friendly options sit around ±0.005mm; performance-focused units dip below ±0.001mm.
Firmware Ecosystem and Setup Complexity
Some sensors are plug-and-play on Creality 32-bit boards with pre-compiled firmware. Others, especially eddy-current sensors like the Eddy Duo, require compiling Klipper firmware from source and manually configuring macros. If you’re not comfortable editing config files or flashing bootloaders, choose a sensor with a broader out-of-box compatibility list.
Quick Comparison
On smaller screens, swipe sideways to see the full table.
| Model | Category | Best For | Key Spec | Amazon |
|---|---|---|---|---|
| BIGTREETECH Eddy Duo | Eddy Current | High-speed Klipper builds | 20-second bed mesh | Amazon |
| Creality CR Touch (B0D62T7YXF) | Optical Probe | Neo/S1 series drop-in | ±0.04mm precision | Amazon |
| Creality CR Touch (B09CYKMYQS) | Optical Probe | Ender 3/5/CR-10 classic | 100k+ cycle lifespan | Amazon |
| Creality CR Touch (B0BS3HGMNW) | Optical Probe | Multi-bracket wide fit | 3 mounting brackets | Amazon |
| Creality CR Touch (B0992JPLGR) | Optical Probe | Ender 5 Plus / CR-10 wide | Pre-compiled firmware | Amazon |
| Geeetech BL-Touch V3.2 | Hall-Effect | Budget builds with adapters | ±0.003mm repeatability | Amazon |
| ANTCLABS BLTouch | Hall-Effect | DIY and open-source rigs | ±0.005mm repeatability | Amazon |
In‑Depth Reviews
1. BIGTREETECH Eddy Duo
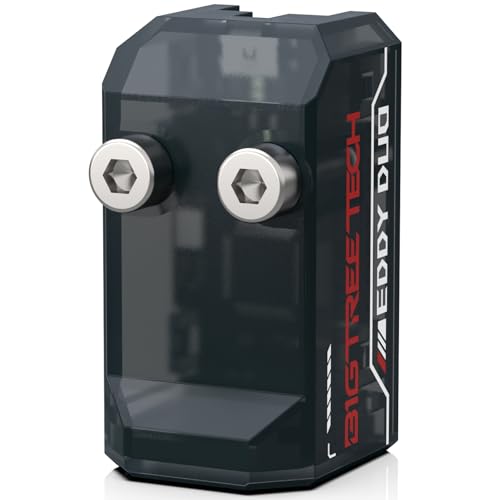
The Eddy Duo uses an eddy-current coil that senses the distance to the print bed without ever touching it, eliminating mechanical wear. It completes a full bed mesh on a 250x250mm surface in roughly 20 seconds—six to nine times faster than a traditional BLTouch. The precision rating of 0.0005mm repeatability is the tightest in this roundup, but that figure is achievable only when the temperature compensation algorithm is calibrated correctly for your specific bed material.
Communication is handled via a dip-switch-selectable USB or CAN bus, giving you two wiring paths depending on your mainboard. The package includes a 2.5-meter USB cable and a 200mm ZH1.5-to-4-pin cable for CAN connection to EBB SB2209 fan boards. Weighing only 6 grams, it minimizes inertia on fast CoreXY toolheads—especially relevant on Voron StealthBurner or Trident builds. This sensor is Klipper-only, so Marlin users should look elsewhere.
Heat drift is the main caveat: several users report that the sensor’s readings shift if the hotend is left parked directly over the bed during heat soaking. The recommended workaround is to raise the toolhead to Z100 before the chamber reaches temperature. The sensor is also incompatible with beds using unevenly spaced circular magnets—if your printer has a Prusa MK52-style bed, this won’t work.
Why it’s great
- Blazing fast 20-second full bed mesh
- Extremely light 6-gram weight reduces toolhead inertia
- Flexible USB or CAN communication
- Advanced temperature compensation for stable readings
Good to know
- Klipper-only—no Marlin support
- Poor performance in heated chambers above 60°C
- Incompatible with beds using non-uniform circular magnets
2. Creality CR Touch (B09CYKMYQS)

This first-party Creality CR Touch replaces the original BLTouch on Ender 3, Ender 3 V2, Ender 3 Pro, Ender 3 Max, Ender 5, and CR-10 models equipped with 32-bit V4.2.2 or V4.2.7 mainboards. The key upgrade over the BLTouch is the use of an internal optical sensor instead of a hall-effect one, which eliminates the magnetic hysteresis that can cause inconsistent deployments on cheaper clones. Creality rates the probe for over 100,000 cycles.
Installation is genuinely easier than most competition because you download a pre-compiled firmware .bin from Creality’s website, copy it to a microSD card, and insert it into the printer slot—no separate ISP programmer or USBASP tool required. The kit includes a replacement probe tip and works with PEI, sticker, glass, and metal print platforms. Users on Klipper and Marlin both report reliable performance, though the Z-offset does need a one-time calibration pass.
The metal probe tip is noticeably more durable than the plastic-tipped clones, and the unit’s self-test routine blinks the LED if the pin fails to deploy. The most common complaint isn’t about the hardware but the firmware documentation—finding the exact .bin for your motherboard revision requires careful navigation of Creality’s support site. Once that’s done, the sensor is set-and-forget for months.
Why it’s great
- No ISP burner needed—firmware via microSD card
- Optical sensor offers longer life than hall-effect probes
- Solid metal construction rated for 100,000+ cycles
- Works with glass, metal, PEI, and sticker beds
Good to know
- 32-bit motherboard only—not compatible with 8-bit boards
- Firmware selection can be confusing for new users
- Brackets not included for all Ender models
3. Creality CR Touch No Brackets (B0D62T7YXF)
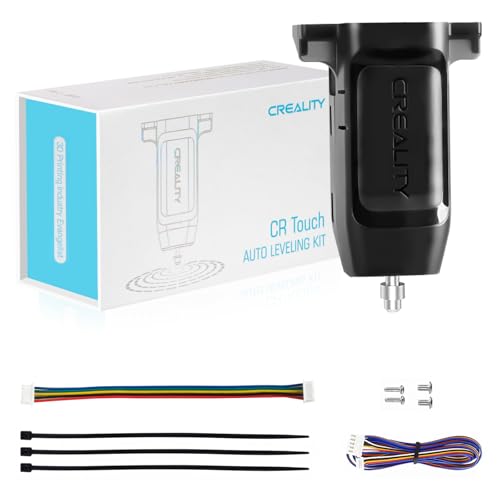
This variant of the CR Touch is specifically designed for Creality’s Neo and S1 lineup—including the Ender 3 NEO, V2 Neo, Max Neo, S1, S1 Pro, S1 Plus, Ender 5 S1, and the newer V3 SE and V3 KE machines. The sensor body is identical to the standard CR Touch optically, but the package intentionally omits mounting brackets because those printers already have a designated mounting point machined into the toolhead carriage.
Repeatability is quoted at ≤0.04mm, which is less precise than the ±0.005mm of the ANTCLABS BLTouch but more than adequate for FDM printing where a 0.2mm layer height is standard. The optical trigger mechanism means no magnetic interference and a consistent deployment force over its 100,000+ cycle lifespan. Users report that installation on the V3 SE and V3 KE is literally a screw-in swap—the wiring is pre-routed from the factory.
The main limitation is that this is a replacement or upgrade part for printers that already have a sensor mount; if you’re retrofitting an older Ender 3 or CR-10 that lacks a dedicated mount, you’ll need to source a bracket separately. The positioning accuracy of 0.04mm is also looser than premium options, so users pushing high-speed input shaping at 200mm/s may notice slight mesh variations.
Why it’s great
- Perfect drop-in for Neo and S1 series printers
- Optical sensing provides consistent deployments
- Rated for over 100,000 cycles
- Works with PEI, sticker, glass, and metal beds
Good to know
- No brackets included—requires existing mount
- ±0.04mm precision is lower than hall-effect competitors
- Only compatible with 32-bit boards
4. Creality CR Touch Multi-Bracket Kit (B0BS3HGMNW)
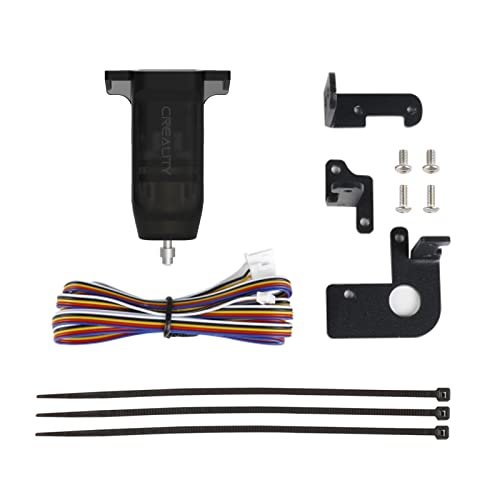
This version of the CR Touch ships with three mounting brackets, making it the most versatile Creality kit for users who own multiple printers or want to retrofit an older machine. It covers the Ender 3 family, Ender 5 series (including the 5 Pro), and the CR-10 line—all on 32-bit V4.2.2 or V4.2.7 boards. The metal probe and optical trigger are identical to the other CR Touch variants, rated for the same 100,000-cycle service life.
The firmware update procedure is the standard Creality process: download the correct .bin from the official site, copy it to an SD card, and power-cycle the printer. Users on Jyers or Professional Firmware for the Ender 3 V2 report better Z-offset consistency than the stock Creality firmware, and the sensor works equally well with glass, magnetic, PEI, and sticker beds. Many users report that this add-on transforms a warped bed into a consistently printable surface.
The minor friction point is that the included brackets are aimed at the specific models listed—if you have an 8-bit board or a non-standard printer like the Ender 6, you’ll need an adapter or a custom mount. A few users also note that the Z-offset can drift slightly between prints if the hotend temperature changes significantly, requiring occasional re-calibration.
Why it’s great
- Three brackets included—wide printer compatibility
- Optical probe eliminates magnetic hysteresis
- Simple firmware update via SD card
- Works with any bed material
Good to know
- Limited to 32-bit boards—no 8-bit support
- Z-offset may drift with large temperature swings
- Brackets only fit listed Creality models
5. Creality CR Touch Kit (B0992JPLGR)
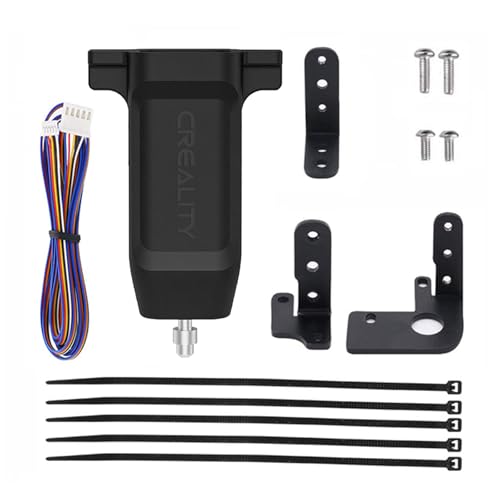
This early-revision CR Touch kit is specifically itemized to include three mounting brackets for the Ender 3, Ender 3 Pro, Ender 3 V2, Ender 5, Ender 5 Pro, Ender 5 Plus, and CR-10 series. The Ender 5 Plus has a particularly large 350x350mm build plate, and the CR Touch handles it well by recording a 5×5 or 7×7 point mesh depending on your firmware configuration. The optical trigger mechanism provides consistent deployment force across the entire bed surface.
Installation is straightforward for anyone who has flashed firmware before: download the CR Touch .bin for your specific mainboard variant, drop it on the SD card, and power on. The auto-leveling routine then runs automatically before each print if you configure the start G-code to include G29. Users consistently report that the sensor eliminates the need for manual dial adjustments except for initial Z-offset and occasional spring tension checks.
The primary limitation is that this kit only supports 32-bit V4.2.2 and V4.2.7 mainboards—older CR-10 units with 8-bit Melzi boards will need a different solution. Some users also report that the wiring harness is on the shorter side, requiring careful routing on larger printers like the Ender 5 Plus to avoid snagging during full Y-axis travel.
Why it’s great
- Includes three brackets for broad Creality compatibility
- Handles large build plates like the Ender 5 Plus
- Pre-compiled firmware for quick setup
- Optical sensor provides long service life
Good to know
- 32-bit boards only—no 8-bit support
- Wiring may be short for large-format printers
- Firmware version must match board revision
6. Geeetech BL-Touch V3.2

Geeetech’s BL-Touch V3.2 is a hall-effect clone of the ANTCLABS design that costs significantly less while offering a quoted repeatability of ±0.003mm—tighter than the original BLTouch’s ±0.005mm. The package includes four mounting brackets plus two extension cables (18cm and 100cm) to accommodate different printer wiring layouts. It also includes an adapter pinboard that lets you use the sensor with both 8-bit and 32-bit motherboards.
The hall-effect mechanism means the pin deploys and stows magnetically, with no internal optical sensor to fail. The self-test routine cycles the pin twice on power-up; if the LED blinks, the sensor is reporting a fault. Users on Ender 3 V2s with 4.2.2 boards report repeatability within 0.005mm in real-world M48 tests, matching the Creality CR Touch at a lower upfront cost. The long 100cm cable is particularly useful for larger printers like the CR-10 series.
The weak point is documentation—the wiring pinout differs from Creality’s standard BLTouch, leading to confusion if you follow generic BLTouch guides. Several users report that the black wire and white wire are swapped relative to the original, requiring a pin re-order in the connector. The sensor also has an occasional first-unit failure rate, though the Geeetech support team appears responsive with replacements.
Why it’s great
- Excellent ±0.003mm repeatability on paper
- Works with both 8-bit and 32-bit motherboards
- Includes 4 brackets and 2 cable lengths
- Hall-effect means no optical wear parts
Good to know
- Wiring pinout differs from Creality BLTouch
- Inconsistent firmware documentation
- Quality control can vary between units
7. ANTCLABS BLTouch

The original ANTCLABS BLTouch is the sensor that started the affordable auto-leveling revolution. Its hall-effect design deploys a metal pin using an electromagnetic coil, achieving a repeatability of ±0.005mm. The unit weighs only 1.06 ounces and comes with a 1-meter Dupont connector extension cable. Because it’s open-source, virtually every Marlin and Klipper firmware build in the last five years includes native BLTouch support—no special patches needed.
Compatibility extends to any bed material: glass, wood, metal, PEI, or carbon fiber sheets all work because the pin physically contacts the surface. The sensor body is small enough to fit on almost any toolhead, and the pin is replaceable when it eventually wears. Users on CR-10s Pro who replaced unreliable capacitive sensors report a night-and-day difference—going from inconsistent Z-offsets to reliable first layers on every print.
The installation process is the most demanding of all the sensors in this roundup. It often requires custom brackets (not included), re-wiring the Z-endstop connector, disabling the pull-up resistor in firmware, and flashing a custom Marlin build via an ISP programmer or bootloader. The documentation is sparse—many user guides were written years ago and reference outdated board pinouts. The trade-off is that once it’s running, it’s arguably the most universally supported sensor you can buy.
Why it’s great
- Universal bed material compatibility
- Native support in nearly every firmware build
- Proven reliable hall-effect mechanism
- Lightweight design works on any toolhead
Good to know
- Difficult installation—requires firmware flashing
- No brackets or mounting hardware included
- Documentation is outdated and sparse
FAQ
Can I use an auto leveling sensor on an 8-bit motherboard?
Will an eddy-current sensor work on a glass bed?
How many probing points should I use in my bed mesh?
Final Thoughts: The Verdict
For most users, the auto leveling sensor for 3d printer winner is the Creality CR Touch (B09CYKMYQS) because it combines easy SD-card firmware updates with an optically triggered probe that lasts over 100,000 cycles. If you want the fastest possible bed mesh and you run Klipper, grab the BIGTREETECH Eddy Duo. And for a budget-friendly build that works on both 8-bit and 32-bit boards, nothing beats the Geeetech BL-Touch V3.2.