Baby brine shrimp (BBS) are the gold-standard first feed for fry, but separating those tiny, wriggling nauplii from the toxic unhatched eggs and empty shells is the most frustrating bottleneck in home aquaculture. A single clumsy pour can waste an entire 24-hour hatch cycle, leaving your fish hungry and you hunting for a better method. The right sieve kit or hatchery system changes that entirely — turning a messy chore into a 30-second harvest.
I’m Min — the co-founder and writer behind Gadgets Feed. I’ve spent many hours analyzing the mesh densities, material tolerances, and workflow ergonomics of every BBS harvesting tool on the market to find which ones actually deliver a clean, shell-free catch without shredding the shrimp.
This guide ranks the very best baby brine shrimp sieves and hatcheries by their build quality, mesh precision, and real-world ease of use.
How To Choose The Best Baby Brine Shrimp System
The market for BBS tools splits into two distinct categories: dedicated sieve kits for harvesting and fully-contained hatchery incubators. Your choice depends on whether you already own a reliable incubator or need the whole setup from air pump to collection net. Three factors separate the winners from the also-rans.
Mesh Density and Separation Workflow
A proper two-stage sieve uses an 80-mesh coarse round net to trap eggshells while passing the smaller nauplii, followed by a 200-mesh fine conical net to catch the shrimp. If the fine mesh is too loose, shells contaminate the harvest; if it is too tight, water flow backs up and damages the delicate shrimp. Look for kits that clearly label each net and include a replacement for the high-wear fine mesh.
Hatchery Build and Sealing
DIY incubators that rely on a standard soda bottle must seal perfectly at the threaded connection. Leaks here are the single most common complaint — often fixable with plumber’s tape, but frustrating when the kit ships without it. Full acrylic hatcheries with integrated valves and suction-cup mounts avoid this entirely but require a compatible glass tank thickness of 3-10mm. Rimmed or curved tanks break compatibility with many hanging designs.
Hatch Volume and Collection Method
Small-scale breeders with a single spawning tank can get by with a 400ml acrylic incubator or a no-aeration dish. Keepers managing multiple tanks or larger fry need a system that supports bottle swapping, a shutoff valve at the bottom for clean draining, and storage vials to freeze surplus shrimp into “BBSicles.” The collection method matters too — conical nets concentrate shrimp at the tip for easy pipetting, while flat screens can trap shrimp in mesh folds.
Quick Comparison
On smaller screens, swipe sideways to see the full table.
| Model | Category | Best For | Key Spec | Amazon |
|---|---|---|---|---|
| NestBasics Brine Shrimp Hatchery | Premium Kit | USB backup, complete all-in-one setup | 120g kit with USB air pump & acrylic incubator | Amazon |
| Saricho Brine Shrimp Hatchery | Value Pro | Large setups, automatic feeders included | 0.45kg 20-piece kit with auto feeder | Amazon |
| San Francisco Bay Brand Hatchery | Mid-Range | Beginners, seed starter with eggs included | 6.4 oz base with 3 hatch mix packets | Amazon |
| Clscea DIY Hatchery Kit | Budget DIY | Rimless tanks, simple bottle-based incubator | 26-piece parts set for 1.5L bottle | Amazon |
| Clscea Baby Brine Shrimp Sieve Kit | Harvest Tool | Clean daily eggshell separation | 80-mesh coarse + 200-mesh fine nylon net | Amazon |
| Clscea Collection Tubes Kit | Storage Add-on | Freezing surplus for multi-tank feeding | 50 x 1.8ml PP tubes | Amazon |
| Brine Shrimp Direct Hatchery Dish | No-Aeration | Ultra-simple desktop hatching, no pump | 10.86 oz dish yields 100k+ BBS in 24h | Amazon |
In‑Depth Reviews
1. NestBasics Brine Shrimp Hatchery Kit

The NestBasics kit earns the top spot because it delivers a genuinely complete hatching solution in one box — from the acrylic incubator and USB-powered air pump (which can run off a power bank during outages) to the check valve, control valve, air stone, tubing, collection net, pipettes, and storage bottles. With a working volume around 400ml, it is ideal for nano and small breeding tanks where every inch of space counts.
The acrylic chamber mounts via four suction cups to the inside tank glass or uses the included tripod for external placement, giving you flexibility that bottle-based hatcheries lack. The USB pump is a thoughtful contingency — during a power failure, you can plug it into a portable battery and maintain aeration long enough to finish a hatch cycle. Budget-minded users note that the plastic shutoff valve feels cheap and should be swapped for a metal alternative, but the kit’s price point still undercuts most DIY parts runs.
Customer reviews consistently praise the thoughtful assembly: the check valve prevents backflow into the pump, the control valve dials down airflow when the bubbles get too aggressive, and the included pipettes make transferring live nauplii one-handed. The main trade-off is capacity — if you need several hatcheries for a multi-tank fry operation, the Saricho kit below scales better. For a single-tank breeder, this is the most complete drop-in system available.
Why it’s great
- USB air pump runs on power bank for outage-proof hatching
- Four suction cups and tripod offer vertical internal or external mounting
- Includes collection net, pipettes, and storage bottles — no extras to buy
Good to know
- 400ml capacity is small — not ideal for large-scale fry production
- Plastic shutoff valve is weak; upgrading to a metal valve is recommended
- USB pump is buzzy at max; use the included control valve to reduce airflow
2. Saricho Brine Shrimp Hatchery Kit

The Saricho hatchery is the most generous parts bundle in this roundup — 20 pieces including the acrylic incubator, air pump, rigid acrylic tube for support, silicone hoses (30cm clear and 100cm black), air stone, check valve, regulating valve, collection net, three pipettes, two automatic slow feeders, five storage bottles, and a large adjusting clip. The incubator mounts vertically inside or outside the tank via suction cups, or on a flat surface using the included four-corner bracket.
Real-world hatch rates hover around 80% at 77°F over 36 hours using RODI water with 1 teaspoon of salt and ¼ teaspoon of eggs per 250-300ml batch. The 20-piece count means you can run multiple hatcheries without buying additional tubing or fittings. The automatic feeders are a standout feature for busy keepers: they attach via suction cup to the tank glass, and a small bottom hole releases shrimp gradually — perfect for continuous grazing without overfeeding.
Two consistent user notes: the air stone does not sink naturally and may need weighting; the suction cups are unreliable on textured glass after several weeks. Owners running two or three units in a 5-gallon tank report consistent results with zero cross-contamination. The plastic clamp on one reported unit broke, but the overall value proposition remains strong — this kit costs roughly the same as three storage bottles and a collection net from a big-box pet store.
Why it’s great
- 20-piece bundle includes auto feeders, multiple storage bottles, and tubing
- Flexible mounting: suction cups, bracket, or internal/external glass attachment
- Produces consistent 80% hatch rates on standard salt-and-egg ratios
Good to know
- Suction cups lose grip over time, especially on textured tank surfaces
- Air stone floats; needs a small weight or sinker to stay submerged
- Clamp and plastic parts feel budget-tier — handle with care during cleaning
3. San Francisco Bay Brand Brine Shrimp Hatchery Kit

The San Francisco Bay Brand hatchery has been on the market since 2001, and its enduring popularity comes from a deceptively smart design: a hollow black base that doubles as a light trap. When you shine a lamp on the bottle, the hatched nauplii swim downward into the illuminated cone, making collection as simple as opening the valve over a net. The kit includes the base, 3 feet of airline tubing, and three Hatch Mix packets — enough for your first three batches of eggs and salt.
This is a soda-bottle system, so you supply your own 1-liter or 2-liter plastic bottle, air pump, and lamp. Experienced keepers recommend using a one-way check valve to prevent water from siphoning back into the pump if the airline comes loose. A common leak point is the bottle-to-base thread — a wrap of plumber’s tape solves it permanently. The hollow base amplifies pump vibration noise, but setting it on a folded towel deadens the hum effectively.
The included three Hatch Mix packets alone justify the price for a first-timer, saving you the cost of buying eggs and salt separately. However, once those packets run out you will need to buy eggs in bulk — the regular Hatch Mix refills cost more per gram than loose artemia cysts from specialty suppliers. For casual keepers with one or two tanks, this kit’s simplicity and lightweight footprint (4.63 x 2.63 x 9.13 inches) make it the easiest path to your first successful hatch.
Why it’s great
- Light-trap base simplifies BBS collection without extra plumbing
- Comes with three Hatch Mix packets — ready to go out of the box
- Compact footprint fits into small shelf spaces alongside a light clamp
Good to know
- Requires separate bottle, air pump, and lamp — not a standalone system
- Hollow base amplifies pump hum; place on a towel to dampen noise
- Bottle thread leaks are common without plumber’s tape reinforcement
4. Clscea DIY Brine Shrimp Incubator Hatchery Kit
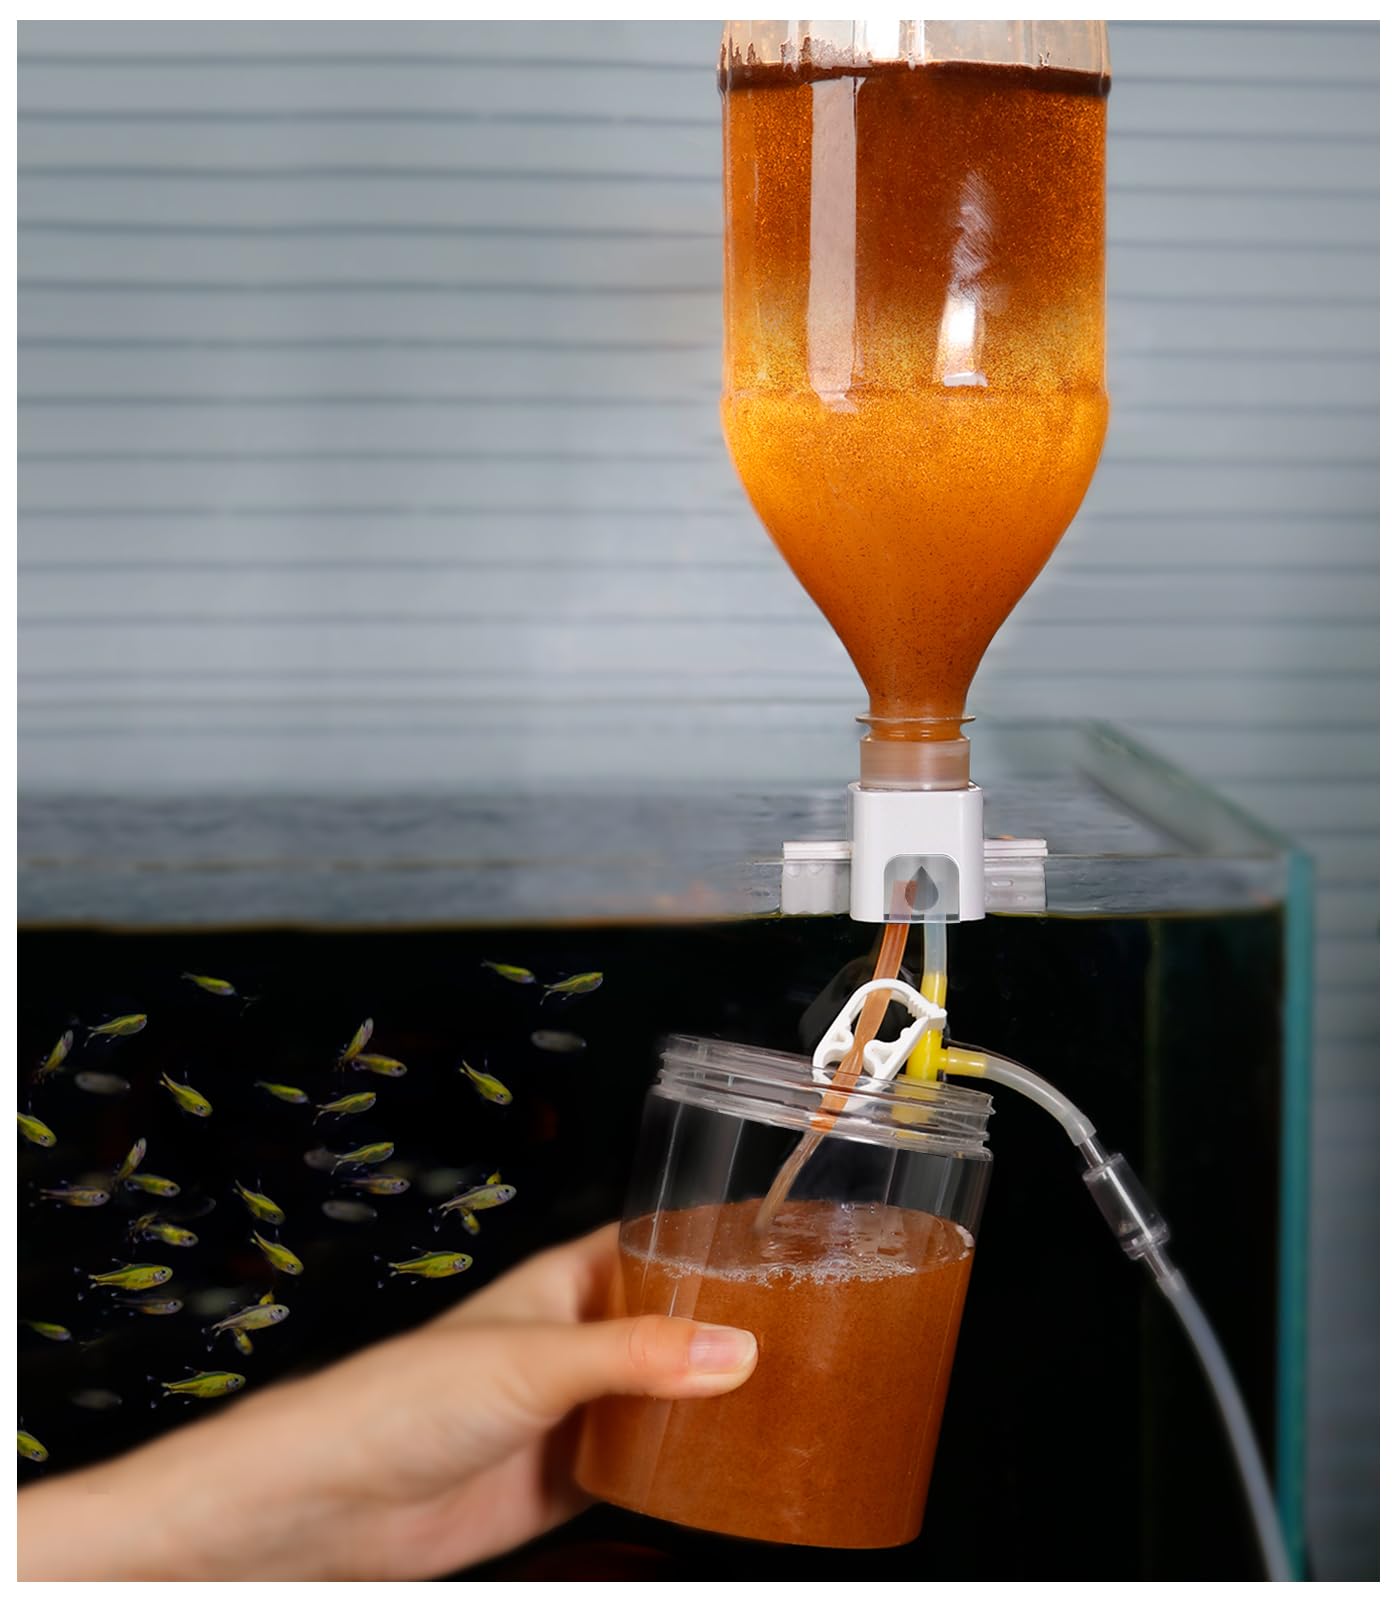
The Clscea DIY kit is the ultimate option for keepers who prefer modular control over their incubation setup. With 26 separate parts — airline connectors, shutoff valves, hanging clips, and a conical collection attachment — you assemble the hatchery around a standard 1.5-liter mineral water bottle. It saves money by omitting the bottle itself, letting you choose your own brand (EVAIN, Coca-Cola, and Fiji work best for thread matching; generic bottles often leak).
The hanging bracket fits tank walls between 3mm and 10mm thick, which covers most rimless glass aquariums but explicitly excludes rimmed or curved tanks. Users who nail the thread seal report 24-hour hatch windows with clean separation. Those who mismatch bottle brands get persistent leaks at the threads — this is the single make-or-break variable. Once running, the hatched shrimp stay fresh for 48 hours at 4-7°C / 39-45°F, giving you a solid window for feeding.
At , this is the cheapest incubator-on-parts approach, but the promise of “26 pieces” includes many tiny o-rings and washers that are easy to lose. A transparent operation card and English manual are included, which beginners appreciate. The kit does not include an air pump, heater, or light — you bring those separately. For the price of two fast-food burgers, you get a reliable hatch cycle, provided your bottle threads cooperate.
Why it’s great
- 26-piece parts kit offers total control over each connection and valve
- Works with common soda bottles — no proprietary chamber to replace
- 48-hour fridge survival time for harvested BBS extends feeding flexibility
Good to know
- Bottle thread compatibility is hit-or-miss; leaks require trial-and-error
- Bracket only fits rimless tanks — rimmed or curved glass owners need an alternative
- Air pump, heat, and light must be purchased separately — not an all-in-one
5. Clscea Baby Brine Shrimp Sieve 80/200 Mesh Kit

If you already have a reliable incubator but struggle with shell contamination, the Clscea sieve kit is the dedicated fix. It includes an 80-mesh round coarse sieve (for trapping eggshells), a 200-mesh conical fine sieve (for catching the 0.4mm nauplii), an extra replacement 80-mesh net, a pipette for direct feeding, two storage tubes for freezing surplus shrimp, and an S-shaped hook for drip-drying after cleaning.
The numbered handles eliminate confusion — the 80-mesh handle is clearly marked so you never accidentally pour the catch through the wrong net. The 200-mesh conical shape concentrates the shrimp at the bottom point, making pipette collection trivial. The polypropylene frames and nylon mesh are food-grade, non-toxic, and tear-resistant if rinsed gently after each use. Users report best results when they pour the hatch through the coarse sieve first, then rinse the fine sieve with low water pressure — high pressure shreds the nauplii.
The one recurring complaint is that the fine mesh has a fabric fold that sometimes traps shrimp. A quick tap or a gentle swirl in a water cup frees them, but it is an extra step. Several buyers wished Clscea had included a spare 200-mesh net instead of a spare 80-mesh net, since the fine mesh wears faster. Overall, this is the most complete sieve-only solution on the market for under , and the pipette and storage tubes mean you can go from hatch to feeding in under 60 seconds.
Why it’s great
- Two-stage 80/200 mesh separation removes shells without crushing shrimp
- Conical fine net concentrates BBS at the tip for fast pipette collection
- Includes pipette, storage tubes, and replacement coarse net — all in one box
Good to know
- 200-mesh net has a fabric fold that can trap shrimp — requires a gentle shake
- Spare net is 80-mesh, not the more commonly worn 200-mesh
- High water pressure during rinsing can kill the hatched nauplii
6. Brine Shrimp Direct Hatchery Dish

The Brine Shrimp Direct Hatchery Dish is a radical departure from every other product in this guide — it requires no air pump, no airline tubing, and no electricity beyond a simple LED light. The dish is a shallow white plastic basin with an integrated fine-mesh screen in the center. You fill the dish with 1 quart of dechlorinated water, add ~2 tablespoons of salt and a single layer of artemia cysts, place it under a warm light, and watch the eggs hatch over 18 to 36 hours.
Because there is no aeration, the hatched nauplii naturally congregate in the bright center of the dish, where the mesh screen sits. Collection is as simple as lifting the screen out — hundreds to thousands of shrimp come with it, almost entirely free of floating eggshells. The manufacturer claims a yield of over 100,000 BBS per 24-hour cycle, which matches user reports of robust hatches from a single teaspoon of eggs. The no-pump design also eliminates the risk of backflow, tube kinks, or pump failure during a hatch.
The trade-off is scale and longevity. The mesh screen is permanently bonded into the dish and cannot be replaced — after months of use it can become clogged with salt residue, at which point the entire dish is functionally single-use. Heavy users with angelfish or goldfish fry needing multiple batches per day find the 1-quart volume limiting. For a desktop micro-hatchery that fits in a windowsill and requires zero maintenance between hatches, this is the most peaceful way to produce live BBS available.
Why it’s great
- No air pump, no tubing, no check valves — just water, salt, eggs, and light
- Shrimp concentrate on the mesh for clean, fast collection without shell waste
- Yields over 100,000 nauplii per cycle from a single small egg charge
Good to know
- Mesh screen is permanent and irreplaceable — clogs over months of use
- 1-quart volume is too small for multi-tank or large-fry feeding needs
- No aeration means hatch timing is more dependent on stable surface temperature
7. Clscea Baby Brine Shrimp Collection Tubes Kit

This is not a hatchery or sieve — it is a storage solution for the final step of your BBS workflow. The kit provides 50 polypropylene tubes, each holding 1.8ml, with snap-on caps designed for freezing. The tubes withstand temperatures from -30°C to 140°C (-22°F to 284°F), so they will not crack when you pour in fresh-hatched shrimp and toss them in the freezer to make “BBSicles” for future feedings.
Keepers with ten or more tanks report that a single hatch session produces far more shrimp than they can feed in one go. These tubes let you portion the surplus into single-serving doses. A 1.8ml tube holds enough BBS for a small nano tank or a single spawning box of fry. The tubes stack neatly — the cap design prevents leaks, so you can stack them in the freezer door without worrying about saltwater drips onto your ice cubes.
The plastic rack (included) is functional but brittle; several users note that it cracks after repeated freeze-thaw cycles. The tubes themselves hold up fine, but the rack may need replacement after a year. If you run a single tank and feed fresh every day, 50 tubes are overkill. For breeders who hatch in bulk every weekend and feed daily, this kit pays for itself by eliminating wasted hatch cycles and giving you a ready-to-thaw shrimp supply for weeks.
Why it’s great
- 50-piece tube set lets you freeze an entire hatch for future daily feedings
- PP material holds -30°C without cracking, warping, or leaking
- Snap-cap design stacks neatly in the freezer for compact organization
Good to know
- Plastic rack is brittle and may crack after repeated freezer exposure
- Only useful if you hatch in batch mode — single-tank daily feeders may not need 50 tubes
- 1.8ml per tube means you will need multiple tubes for a large spawn feeding
FAQ
Which mesh size should I use to separate baby brine shrimp from shells?
Can I hatch brine shrimp without an air pump or aeration?
How long does it take for baby brine shrimp to hatch at 78°F?
How do I freeze baby brine shrimp for later feeding?
Final Thoughts: The Verdict
For most users, the best baby brine shrimp system is the NestBasics Brine Shrimp Hatchery Kit because it combines a USB-powered air pump (with power bank compatibility) and an acrylic chamber that mounts inside or outside the tank, all for a price that beats sourcing parts separately. If you want a dedicated harvesting tool to clean up an existing hatch cycle, the Clscea 80/200 Mesh Sieve Kit delivers pristine shell-free catches in under a minute. And for the keeper who values absolute simplicity — no pumps, no tubing, no electricity — nothing beats the Brine Shrimp Direct Hatchery Dish for a quiet, desktop-friendly hatch.