
Taking a screenshot on a Gateway laptop is simple and quick. You can use built-in Windows keyboard shortcuts or tools like Snipping Tool and Snip & Sketch to capture your screen in different ways.
The quickest method is to press the Windows key + Print Screen key simultaneously. This will capture your entire screen and automatically save it to C:\Users\[YOUR NAME]\Pictures\Screenshots on your Gateway laptop.
In this article, I will show you three easy ways to take screenshots on your Gateway laptop, whether you want a full screen, active window, or a custom area capture. Let’s get started!
1) Take Screenshot Using Windows 10 Shortcuts
There are many keyboard shortcuts that you can use to screenshot your gateway laptop screen easily.
Sometimes a certain keyboard shortcut on some laptops doesn’t work; in that case, try all the methods and use the one that works best for you.
Keyboard Shortcut For Full-Screen Screenshot On Gateway Laptop
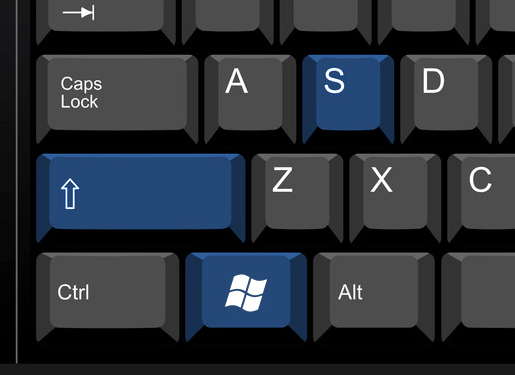
Gateway laptops run on Windows, and Windows 10 & 11 has many built-in tools for taking screenshots. The Snip & Sketch tool is one of the easiest. Press Windows Key + Shift + S to open it and follow the steps below.
- Press the Windows Key + Shift + S
- A Snip & Sketch tab will open at the top of your screen
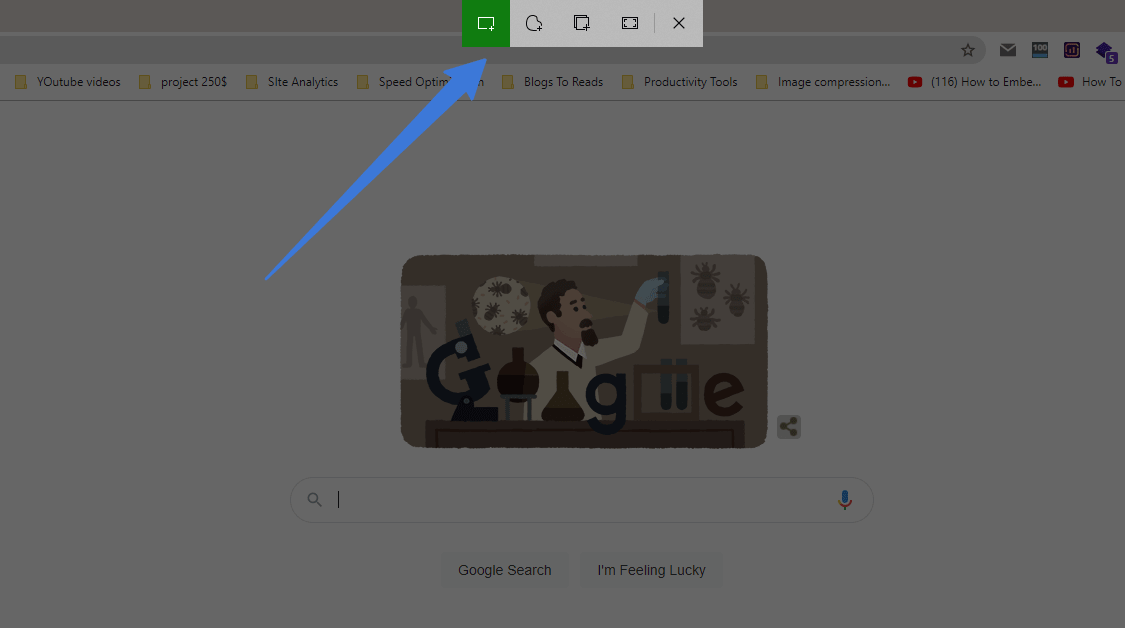
- Select the screenshot type: Rectangular, Full Screen, or Freeform
- Edit the screenshot in the Snip & Sketch software if needed
- Press Ctrl + S to save the screenshot
Take a Screenshot Using Print Screen Key On Gateway Laptop

This is one of the most popular methods for taking a screenshot on laptops or computers. Press the Print Screen key (PrtSc, Print Sc Sys Rq) and the screenshot will be copied to your clipboard.
- Open the window you want to screenshot
- Press the Print Screen key on the top right corner
- Open Paint or any image editing software
- Press Ctrl + V to paste the screenshot
- Press Ctrl + S to save it
Take a Screenshot Using the Window Key + Print Screen Key
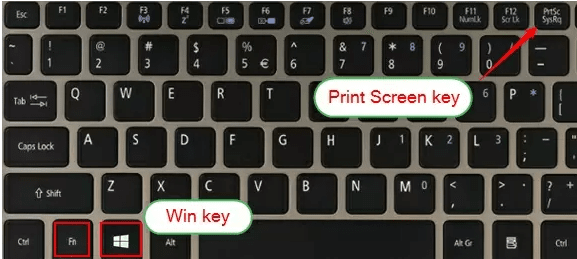
This method automatically saves the screenshot to your Gateway laptop without needing to paste it manually into any software.
- Open the tab or window you want to screenshot
- Press the Windows key + Print Screen key
- Go to C:\Users\[YOUR NAME]\Pictures\Screenshots — the screenshot will be saved there
Take Screenshots Using Print Screen For Active Window
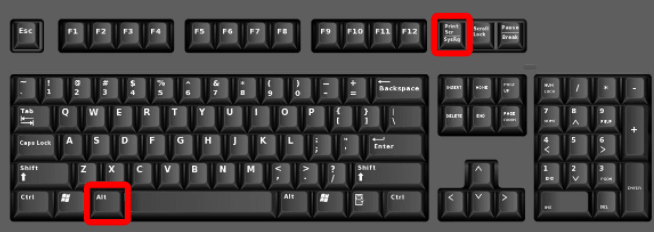
If you want to screenshot only the active window and ignore other open windows, follow these steps:
- Select the window or tab you want to screenshot
- Press the Alt + Print Screen key
- Open Paint or any image editing tool
- Press Ctrl + V to paste the screenshot
- Press Ctrl + S to save the screenshot
2) Take Screenshot Using The Snipping Tool
The Snipping Tool is a popular built-in utility in Windows 10 & 11 for taking screenshots of your laptop or computer screen.
Here is how you can take screenshots on the Gateway laptop using the Snipping Tool:
- Type Snipping Tool in the Windows search bar and open it
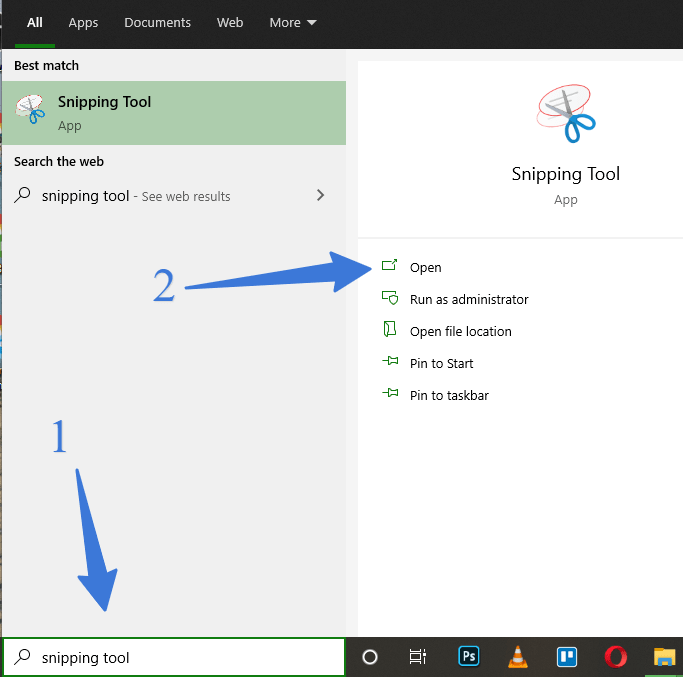
- Click on New
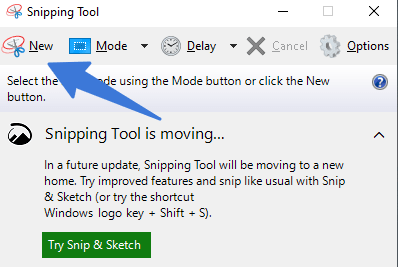
- Select the area you want to screenshot
- Edit the screenshot with the pen or pencil tool if needed
- Press Ctrl + S to save it
3) Take Screenshots Using Snip & Sketch
Using the built-in Windows 10 Snip & Sketch tool, you can easily take a screenshot on your Gateway laptop. This software also allows you to edit your screenshot with different editing options.
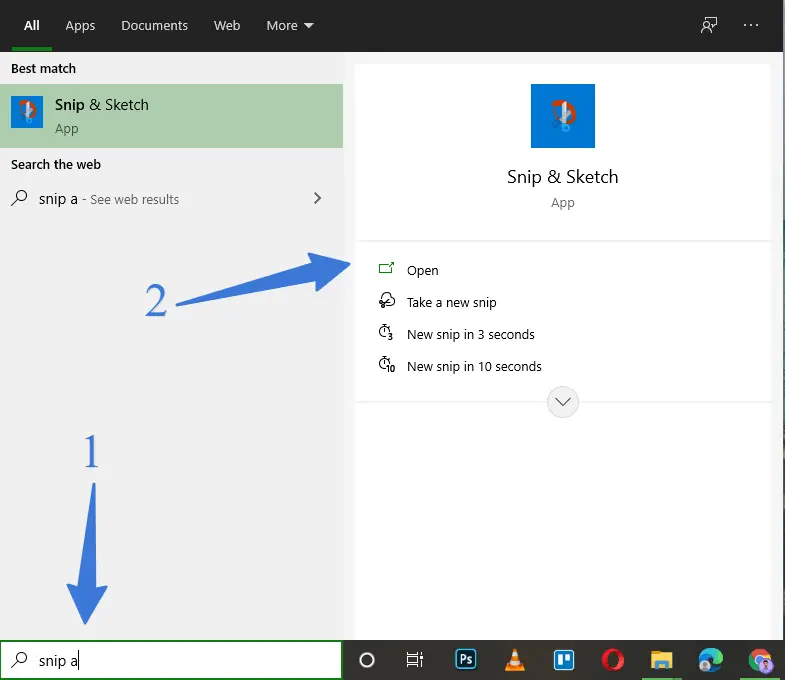
- Open Snip & Sketch from the Windows search bar
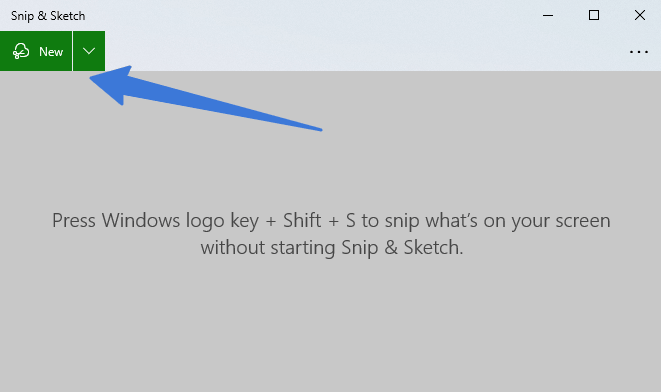
- Click New
- Select the type of screenshot you need and take the screenshot
- Edit the screenshot using the available editing options
- Press Ctrl + S to save the screenshot
FAQ (How to Screenshot on Gateway Laptop)
Below are some commonly asked questions related to taking screenshots on a Gateway laptop.
How do you screenshot on a Gateway laptop Windows 7?
For taking a screenshot on a Gateway laptop in Windows 7, press the Print Screen key on the keyboard, then open Paint or any image editing software and press Ctrl + V to paste the screenshot. Save it using the Ctrl + S shortcut.
Where do screenshots go on a Gateway laptop?
Screenshots taken using the Windows key + Print Screen shortcut are automatically saved to C:\Users\[Your Name]\Pictures\Screenshots on your Gateway laptop.
How do I take a screenshot on a Gateway laptop without the Print Screen key?
You can use the Windows key + Shift + S shortcut to open the Snip & Sketch tool, which lets you take a screenshot without needing the Print Screen key. Alternatively, search for “Snipping Tool” in Windows search and use it to capture any area of the screen.
Conclusion
Taking a screenshot on your Gateway laptop is simple and easy whether you are using Windows 10, 11, or Windows 8. All the methods mentioned in this article will work on those versions of Windows. After reading this article, hopefully, you will be able to take a screenshot on your Gateway laptop with ease.
You May Also Like:
3 Easy Ways to Take Screenshot on Lenovo ThinkPad
How To Screenshot On Samsung Laptop
How to Screenshot On Acer Laptop
How to Screenshot on Sony VAIO Laptop