
Taking screenshots on a Lenovo laptop is easy and convenient. You can use keyboard shortcuts or built-in software on Windows 10 & 11 to capture your screen in different ways.
One of the simplest methods is to press the “PrtSc” (Print Screen) key on your keyboard. This will capture your entire screen and save it to your clipboard. You can then paste and share the screenshot as you wish.
In this article, I will show you more ways to take screenshots on your Lenovo laptop, depending on your needs and preferences. Whether you want to capture a specific window, a region, or the whole screen, I will show you how to do it quickly and easily.
1)Take Screenshots Using Keyboard shortcuts
Using a keyboard shortcut increases your productivity if you are doing a task, again and again, So this method will surely help you out if you regularly take screenshots on your laptop.
Keyboard shortcut For Full-Screen Screenshot on Lenovo Laptop
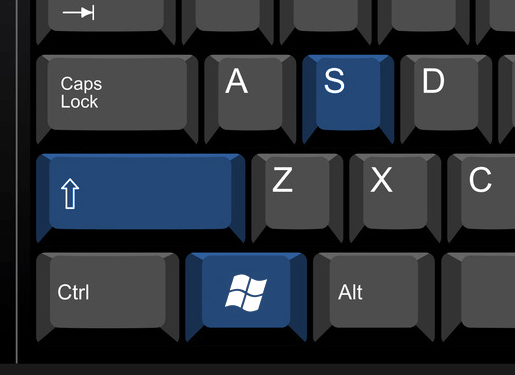
If you’re using Windows 10 or 11 on your Lenovo laptop. Press Window key
+ Shift + S will open a snip & sketch tool tab on the top of your screen. You can then choose which type of Screenshot you want by clicking on the different icons on the tab.
Once done, the Screenshot will be automatically copied to the Snip & Sketch windows, where you can edit and highlight the Screenshot.
For saving the Screenshot, you can use a keyboard shortcut Ctrl + S to save it to wherever you want on your Lenovo laptop.
Take a Screenshot in Lenovo Using the Print Screen Key

The other most used method for taking screenshots on laptops or computers is the Print Screen key (Print Sc, Print Scs). For this, open the tab window you want to screenshot on your Lenovo laptop and follow the steps below.
- Press the Print Screen key
- Open any imaging editing software, e.g. Paint or Paint 3D
- Press Ctrl + V to paste the Screenshot on the Paint.
- Edit the Screenshot if you want to use the tools in your software
- Now Save it using the Ctrl + S
Using this method may sound like a lot of work as you have to manually copy the screenshot to your software and then save it on your Lenovo laptop.
So if you are not comfortable with this method, you can switch to the following method, which can automatically store the screenshots on your laptop.
Take a Screenshot in Lenovo Using the Window key + Print Screen For the Entire Screen
The Screenshot taken by using this keyboard shortcut will be automatically saved to your Lenovo laptop memory without you having to do it manually. So how to do that?
- Open the window you want to screenshot
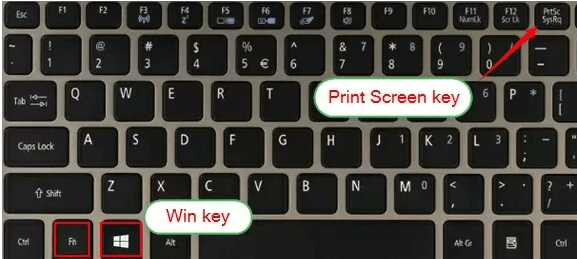
- Press the Windows + Print Screen Key
- Now Go to C:\Users\[YOUR NAME]\Pictures\Screenshots
It’s easy and convenient, but the only limitation with this method is that it screenshots the whole screen, if you want only to screenshot the active window then check the following method.
Take Screenshots in Lenovo Using Print Screen For Active Window
If you have multiple windows open on your Lenovo laptop or computer and want to capture only the active windows, you can do that by following the steps below:
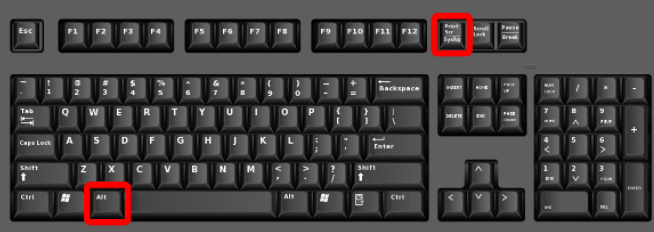
- Select the window you want to screenshot
- Now press Alt + Print Screen Key
- Open Paint or any other image editing software
- Press Ctrl + V to paste the Screenshot
- Press Ctrl + S to save the Screenshot
2) Take a Screenshot on Lenovo using the Snipping tool
The snipping tool is also one of the most used methods for taking screenshots on a laptop or computer. It is also available in Windows 10 and 11, even though the window said it will be replaced by snip and sketch tools.
Below are the steps on how to screenshot on Lenovo using the snipping tool
- Open the snipping tool by searching snipping tool in the Windows search
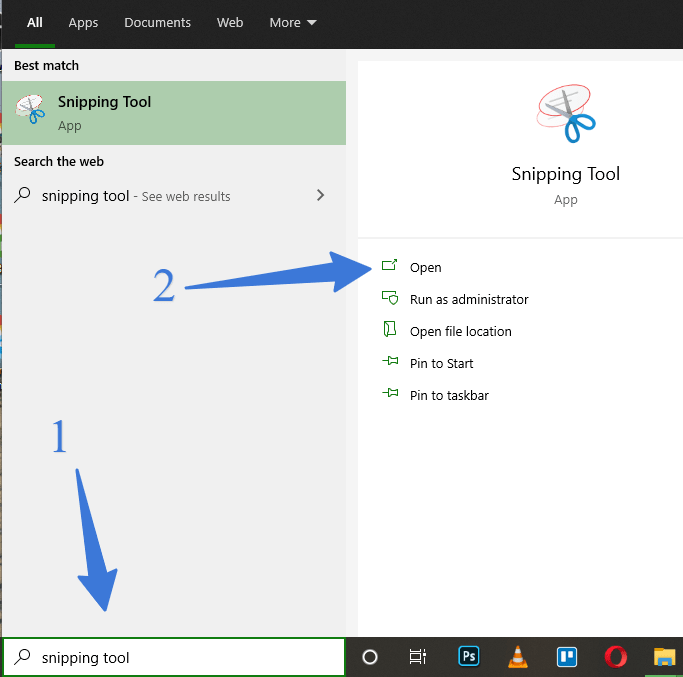
- Open it and click on New
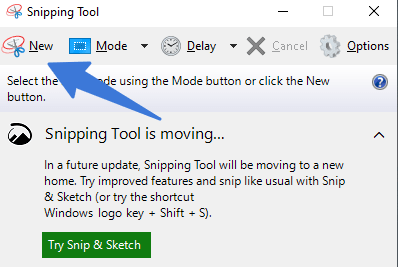
- Screenshot the area you want
- Ctrl + S to save the screenshot to your laptop
3)Take Screenshots Using Snip & Sketch
With a snip and sketch software, you can use a different type of Screenshot, e.g. the entire screen, free form, custom screenshots.
Below are the steps for taking Screenshots on Lenovo using Snip and Sketch.
- Open the Snip and Sketch by searching Snip and Sketch on the window search
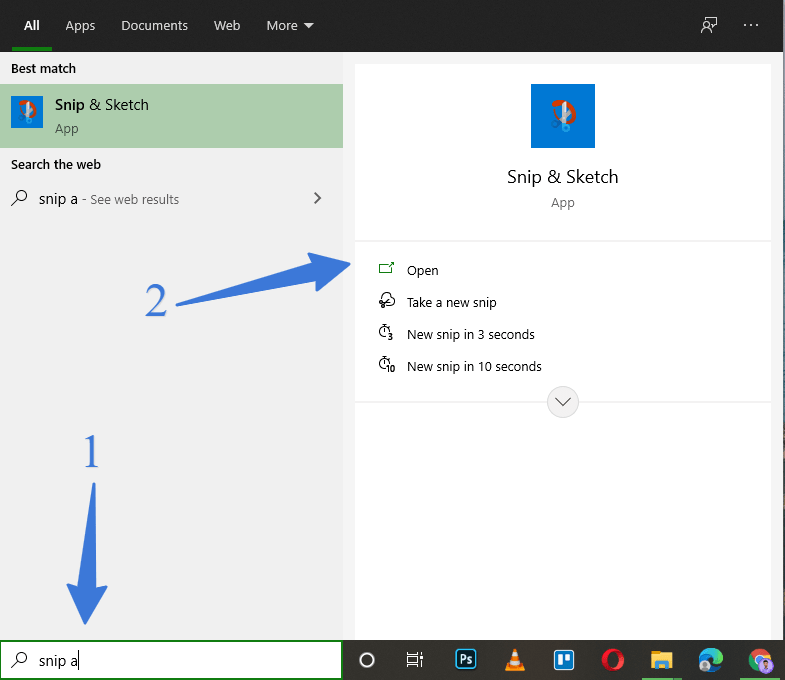
- Open it, and on the top of the tab, click on New
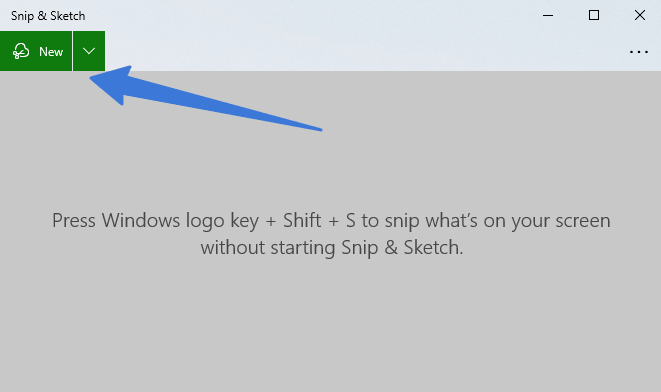
- Select the screenshot type from the tab

- Edit the Screenshot using different editing options available in Snip and Sketch
- Save the Screenshot by using the Ctrl + S keyboard shortcut
FAQ (How To Screenshot On Lenovo Laptop)
Following are some common faqs related to taking screenshots on a Lenovo laptop.
Where do screenshots go on Lenovo?
The Screenshot taken by the Window key + Print Screen key will be stored in path C:\Users\[Your Name]\Pictures\Screenshots on your Lenovo laptop or computer.
How do you screenshot on a Lenovo Chrome laptop?
For taking Screenshots on Lenovo Chromebook. Open the tab you want to screenshot and Press Ctrl + Window Switcher Key located on the top row.
How do you screenshot on a Lenovo laptop Windows 11?
To take a screenshot on a Lenovo laptop running Windows 11, press the “Windows key + Print Screen” keys simultaneously. The screenshot will be saved in the “Screenshots” folder under “Pictures” in the File Explorer.
Conclusion
Taking Screenshots in Windows is a basic skill, but there are many ways you can take screenshots on your laptop one must know all the possible ways of taking screenshots. After reading the article, hopefully, you will be able to screenshots of it on your Lenovo laptop.
You May Like:
How To Screenshot On Samsung Laptop
How to Screenshot On Acer Laptop?
How to Screenshot on Sony Laptop